9

9GitHub

9.5

GitHub—handling branches

GitHub provides facilities for creating, merging and deleting branches. It also has the capability of resolving conflicts that occur in the merging process.

Just to clarify a point, the merging process on GitHub is started by triggering a pull request. You may have seen pull requests mentioned on the GitHub website (and in virtually every piece of documentation that goes with it); there is a button and status for it on the repository home page.

The pull request originates in the communal working environment and it can be interpreted as a request to pull modifications into the repository. I cover it in terms of merging branches in this section (§ 9.5.3) and I cover it as a communal coding activity in section 10.

Where people refer to a pull request, they are generally referring to a process of merging modifications back into the repository.

First things:

9.5.1

Creating a new branch

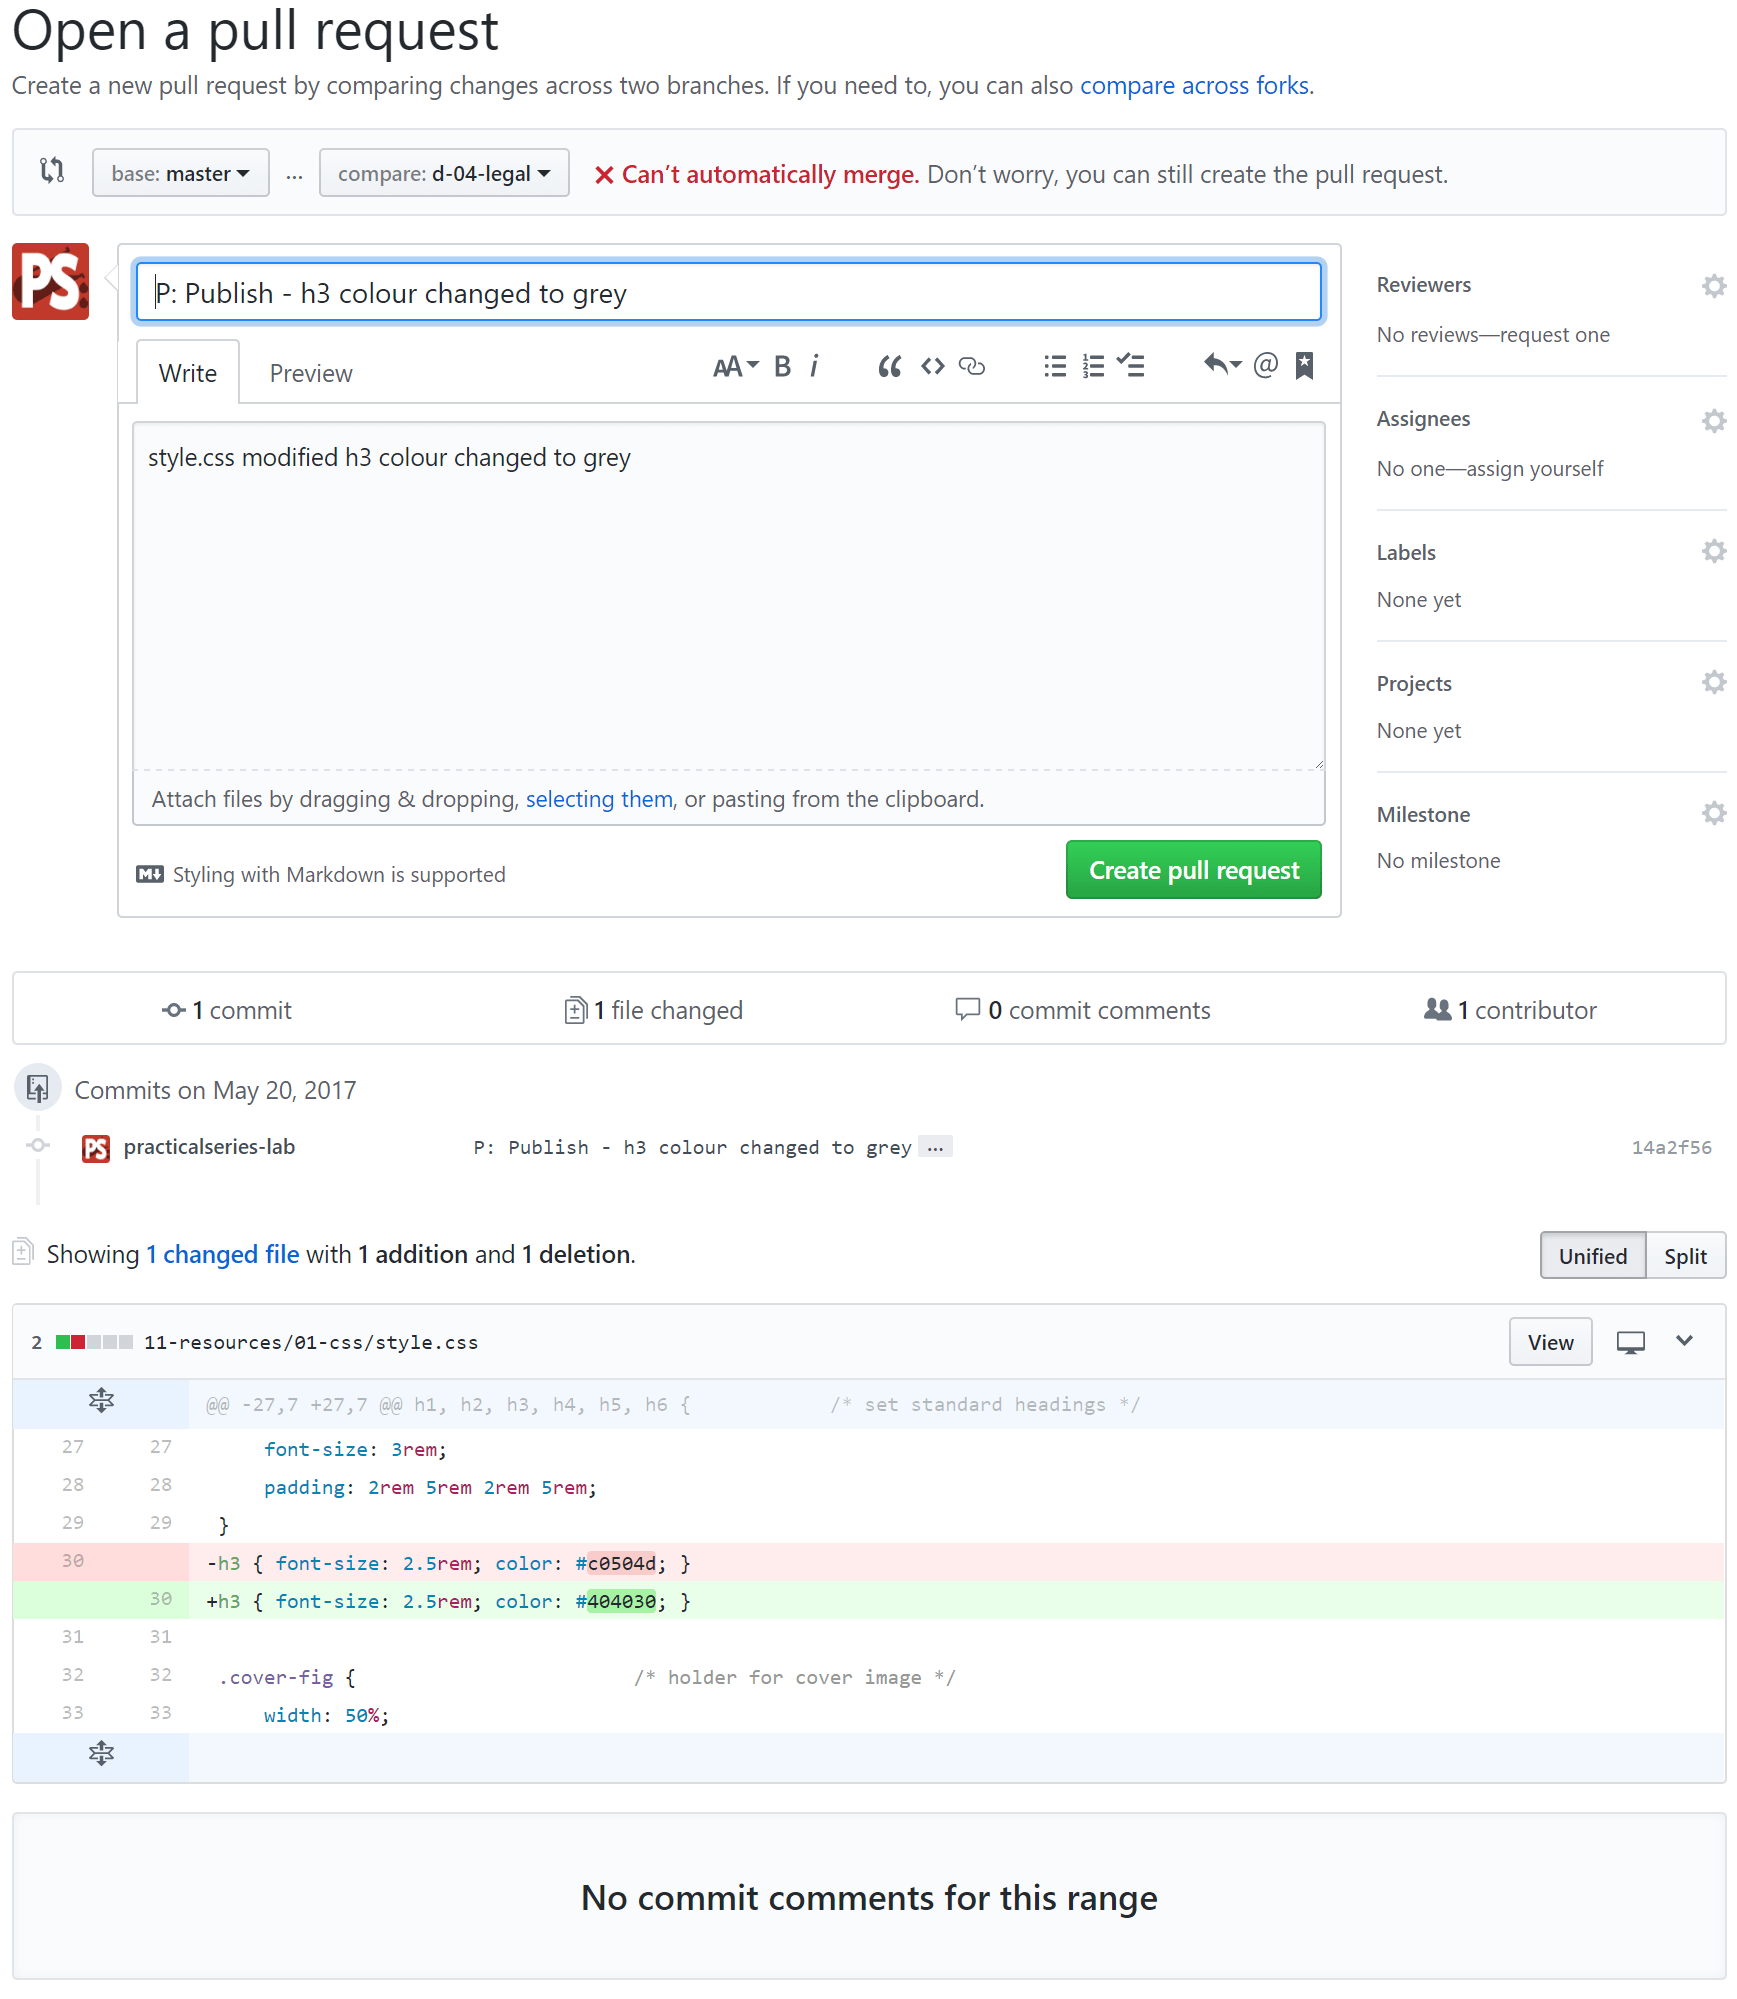
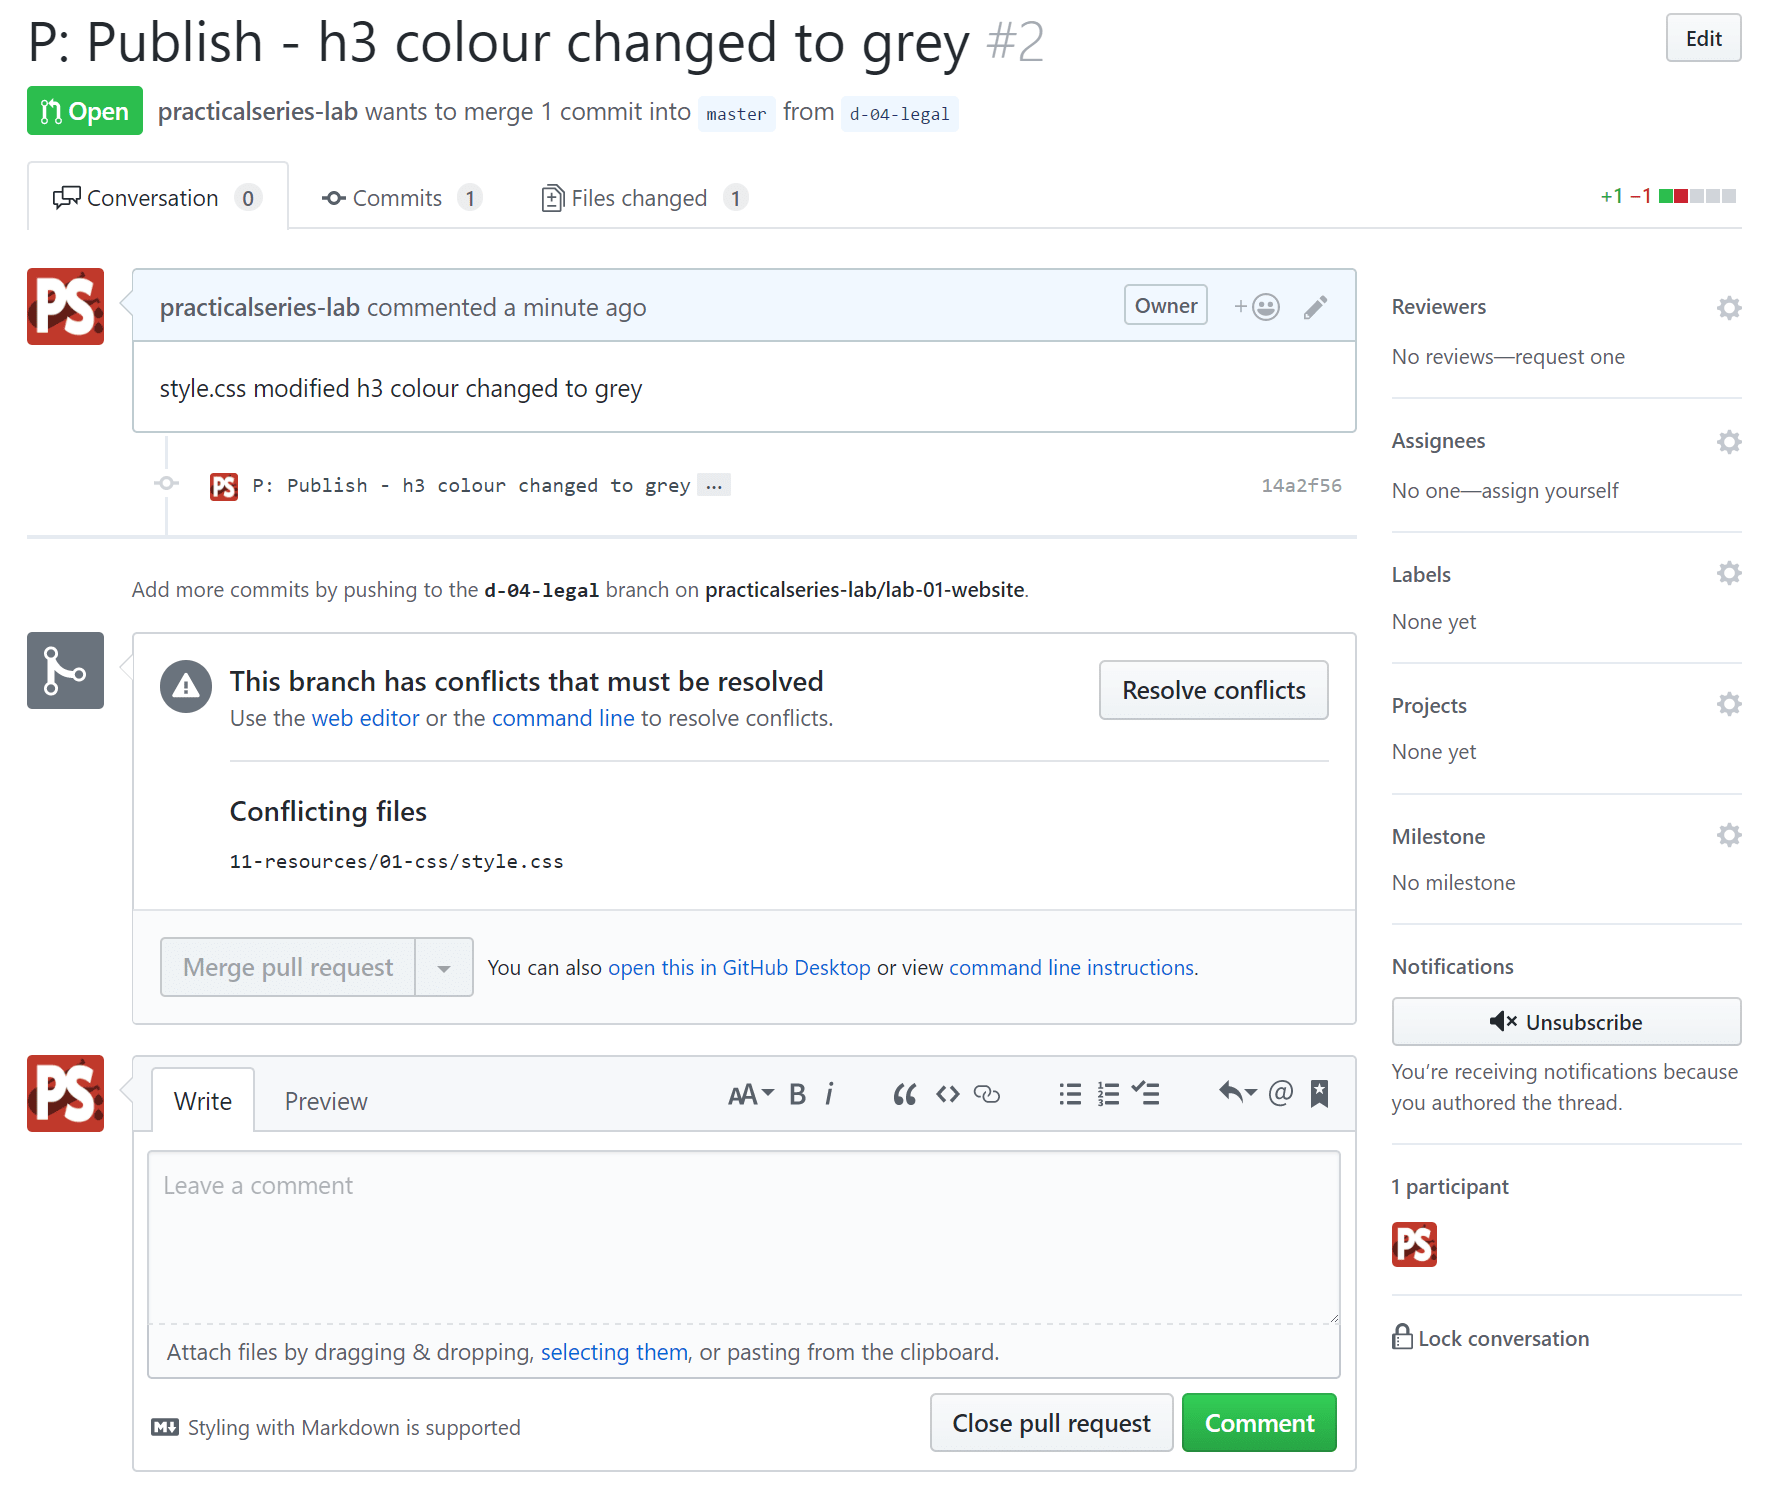
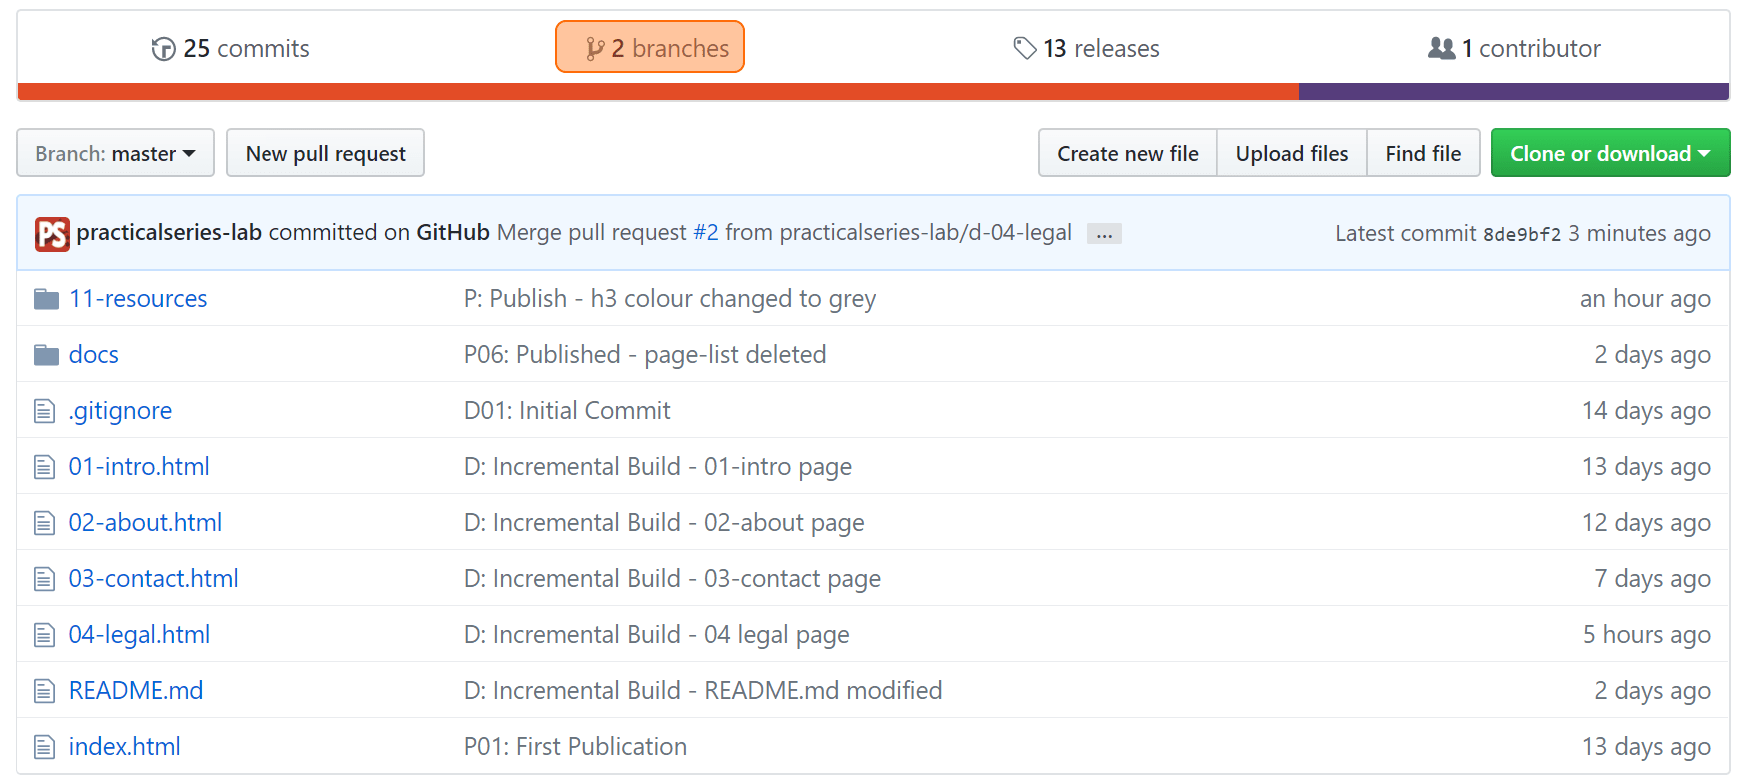
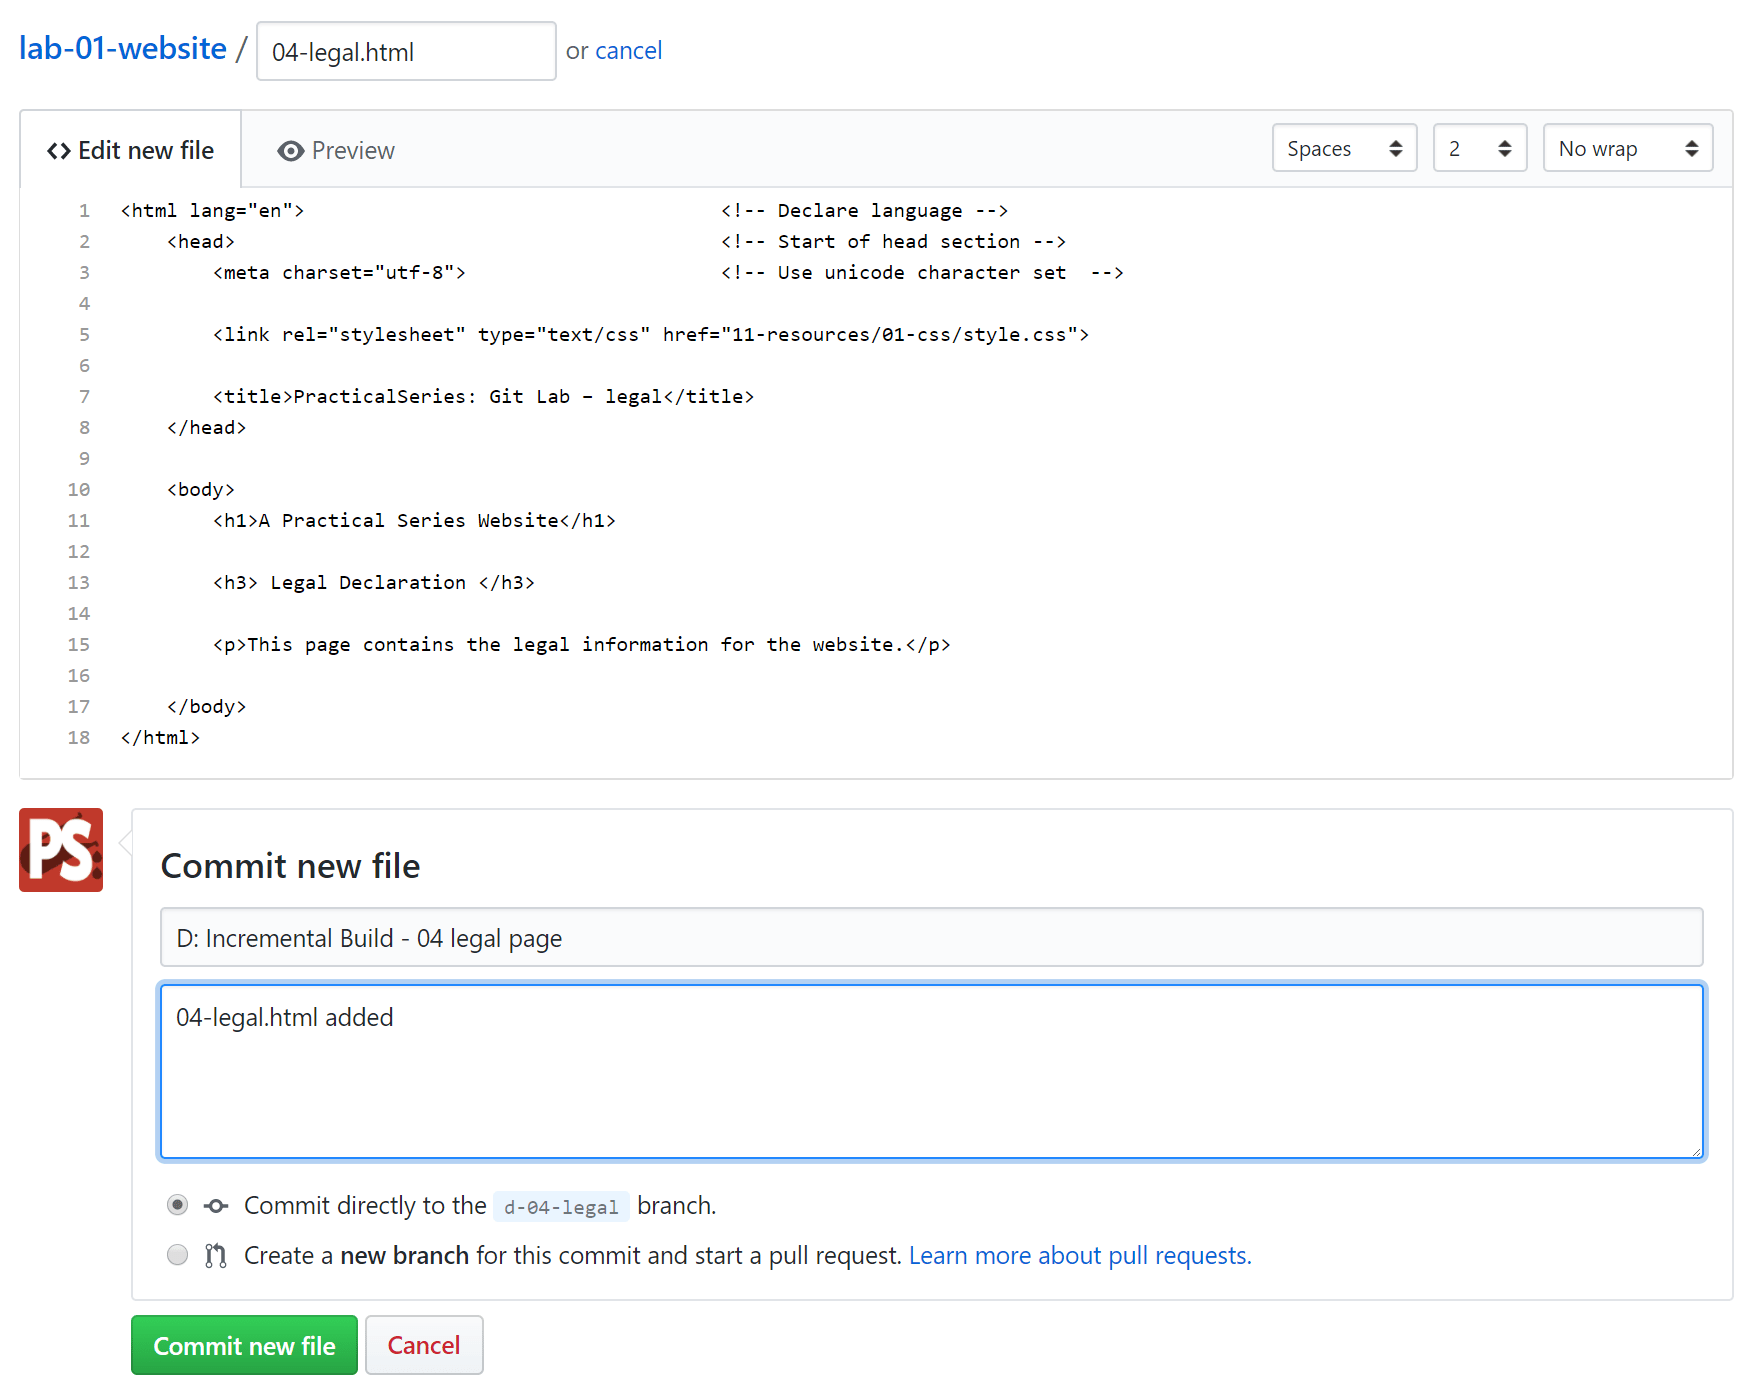
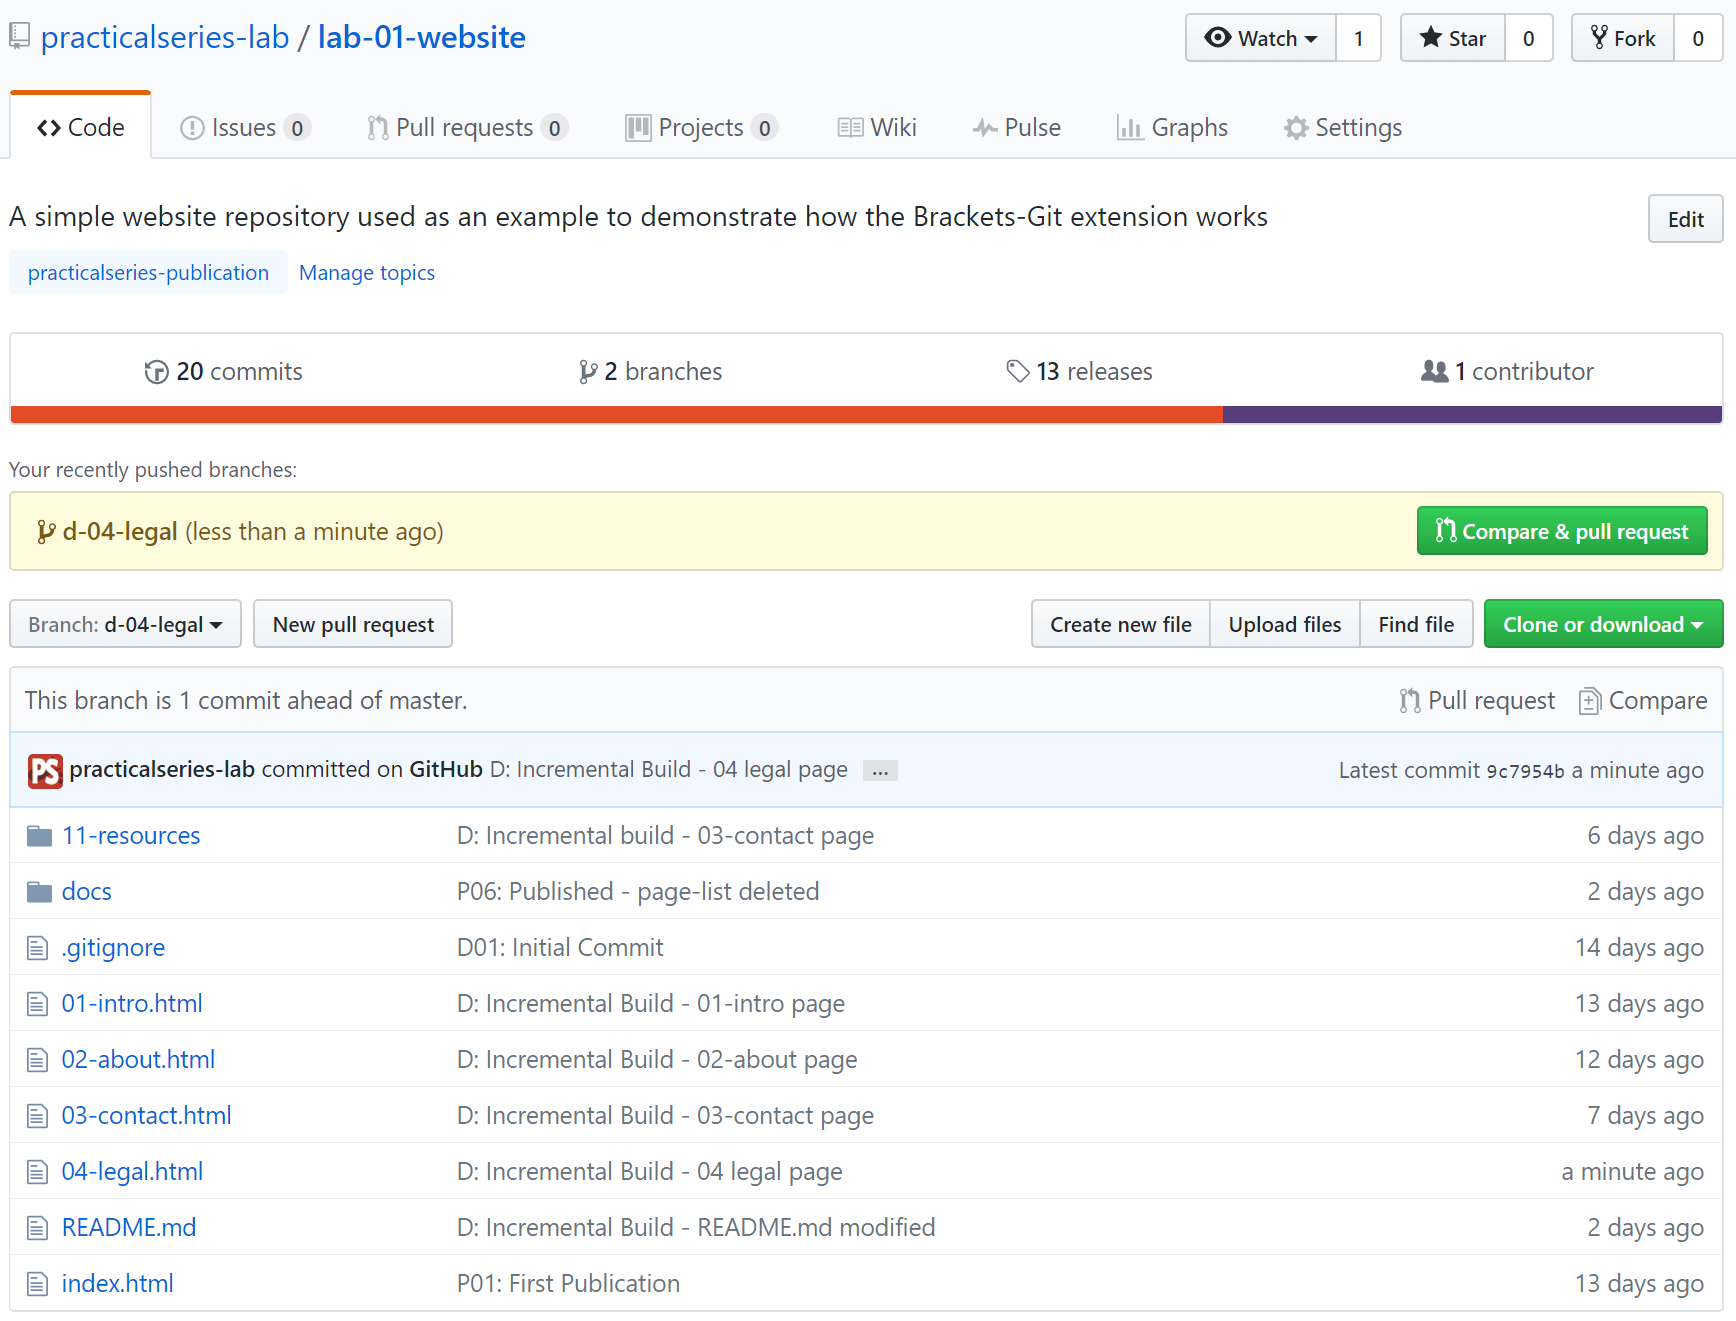
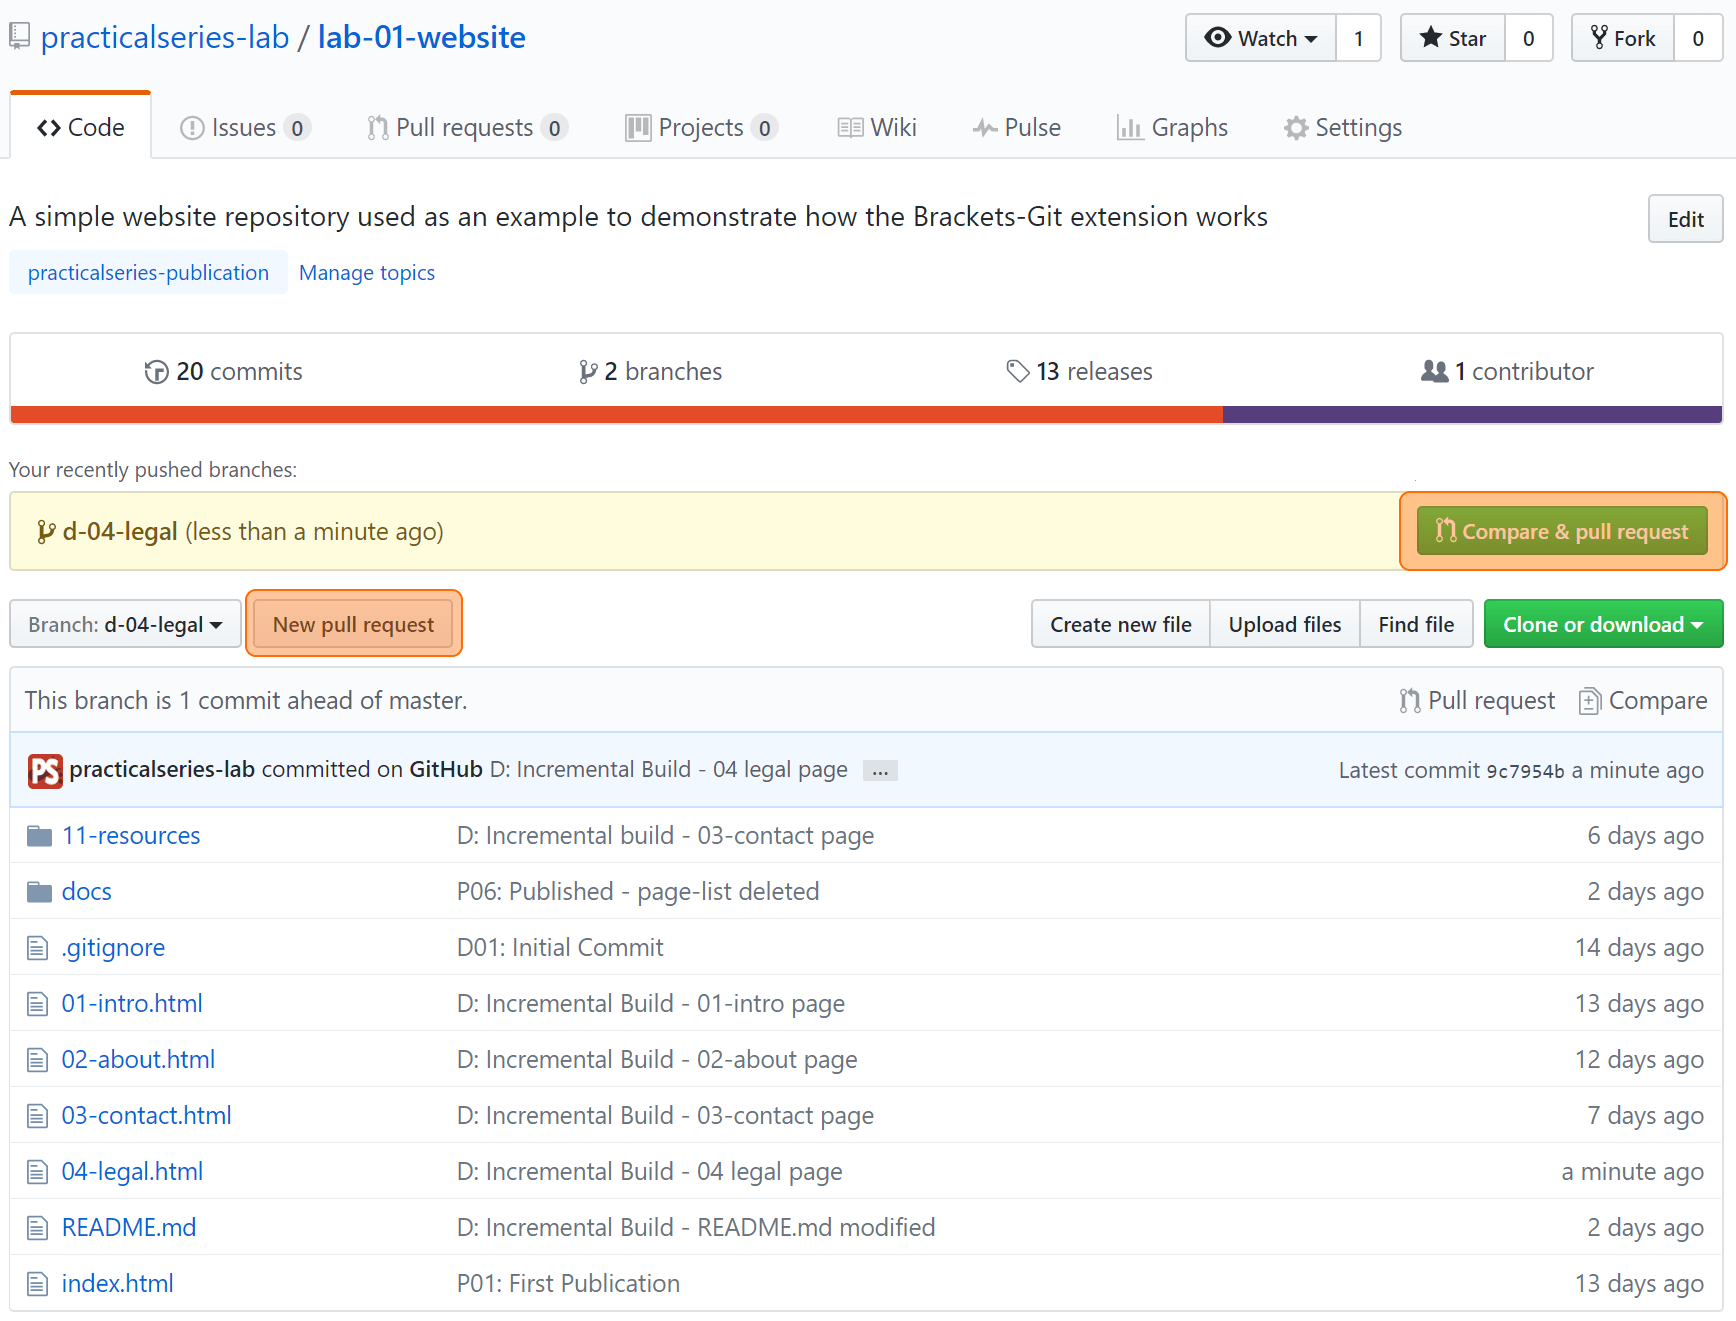
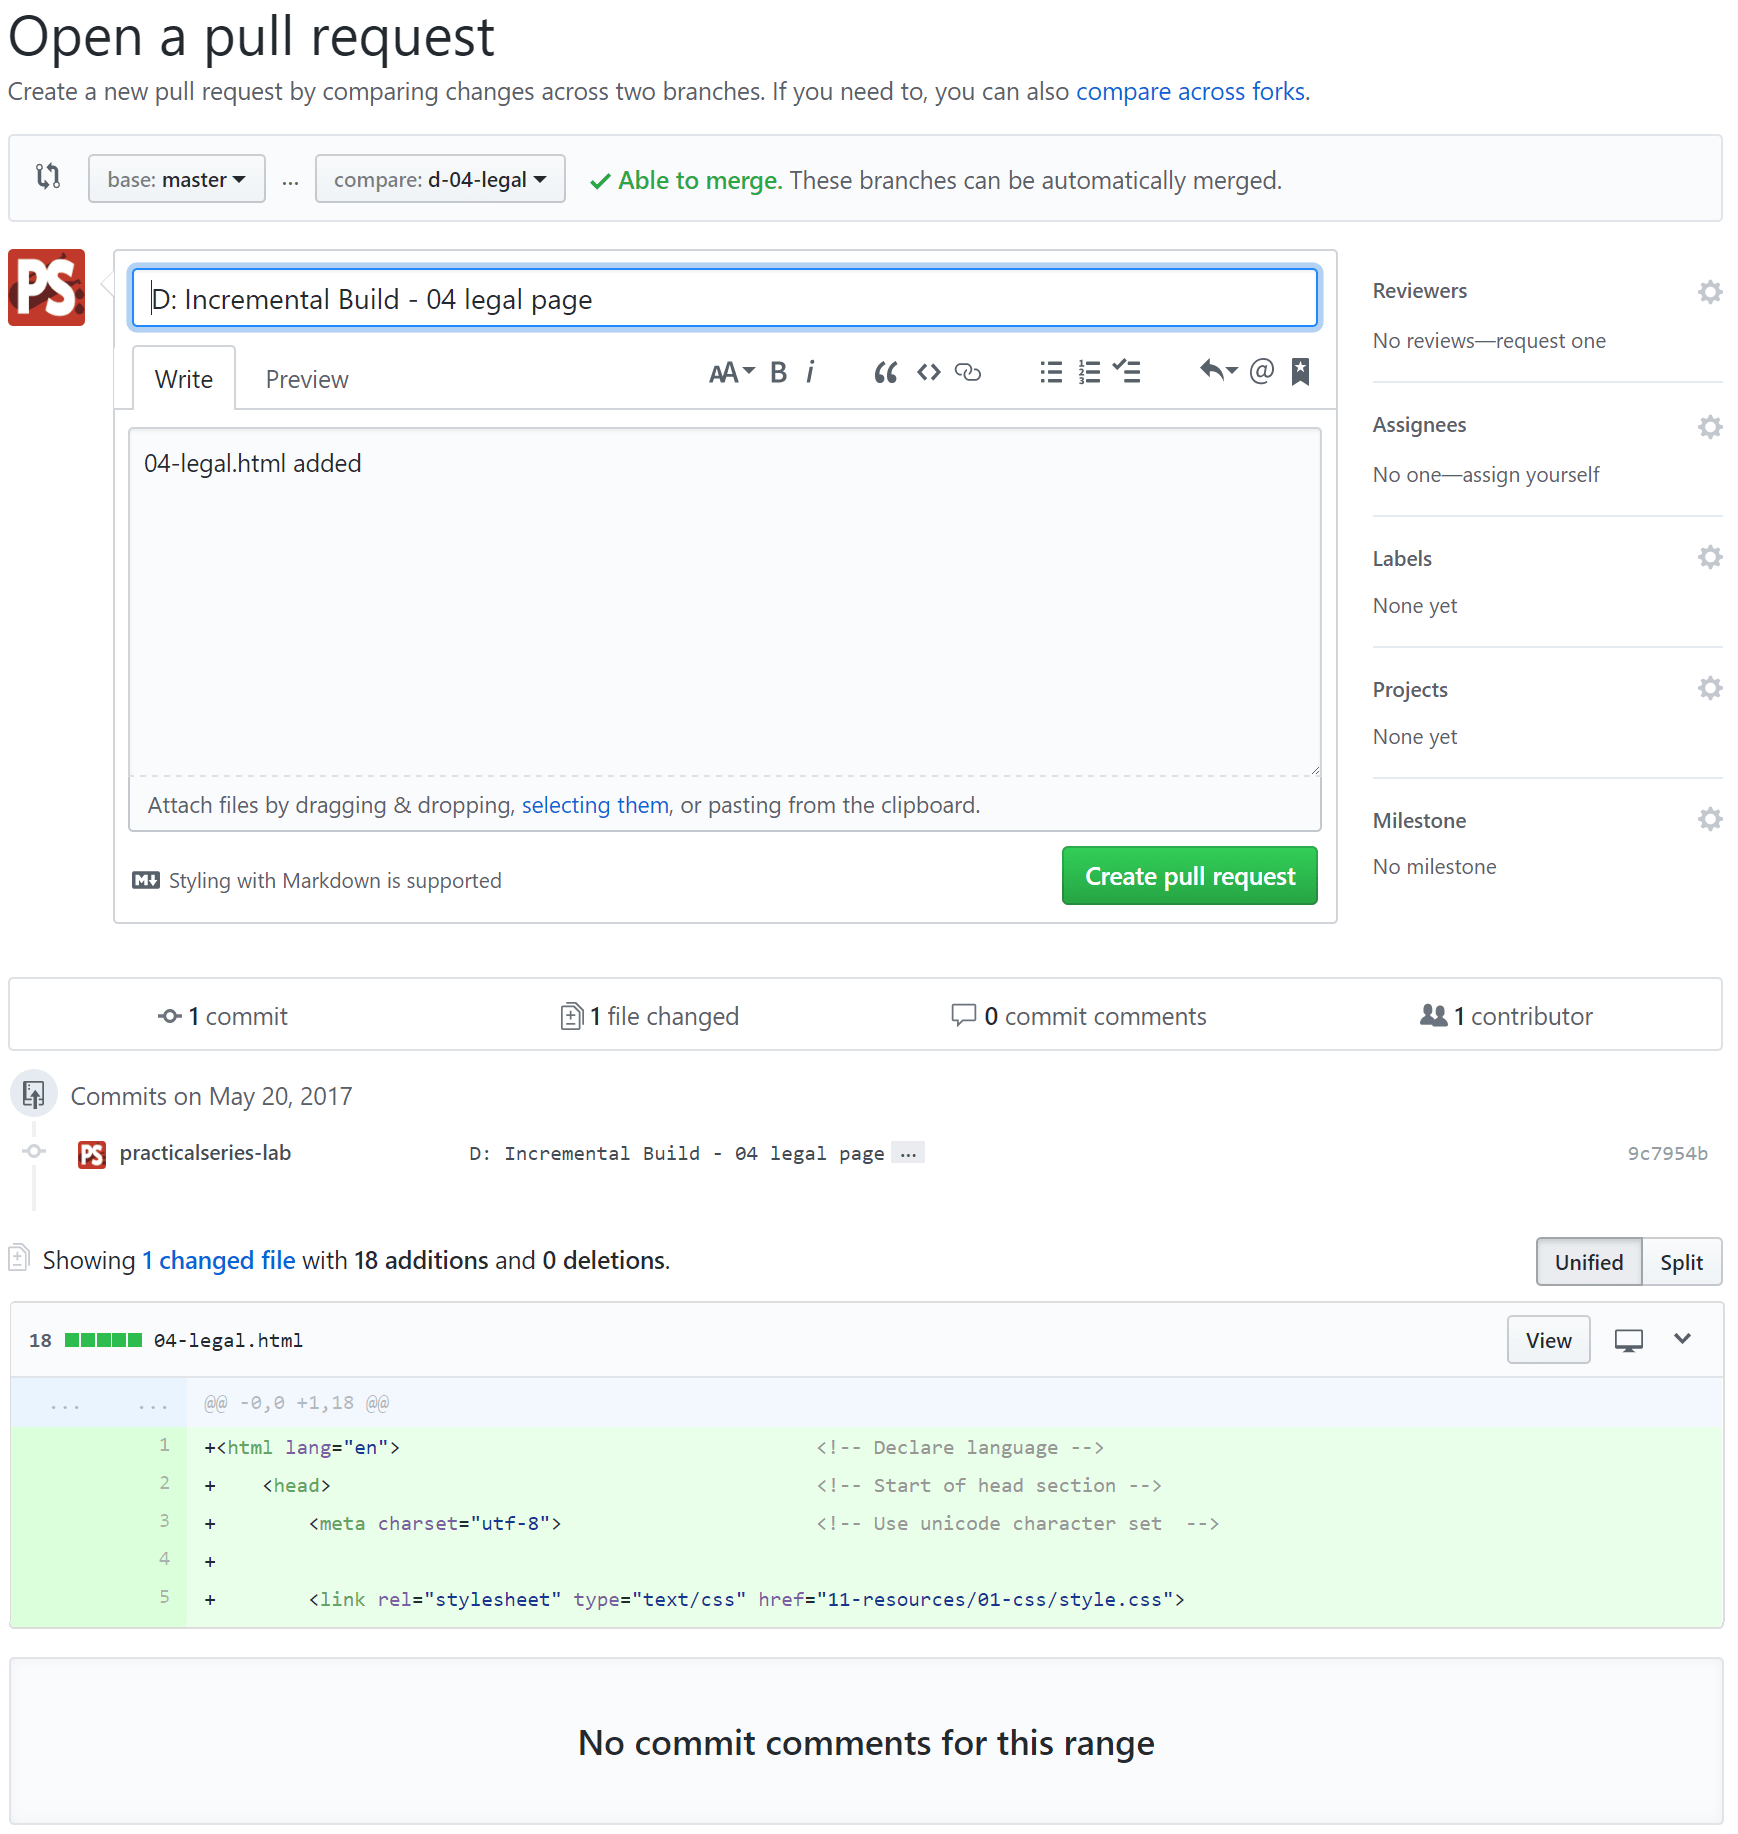
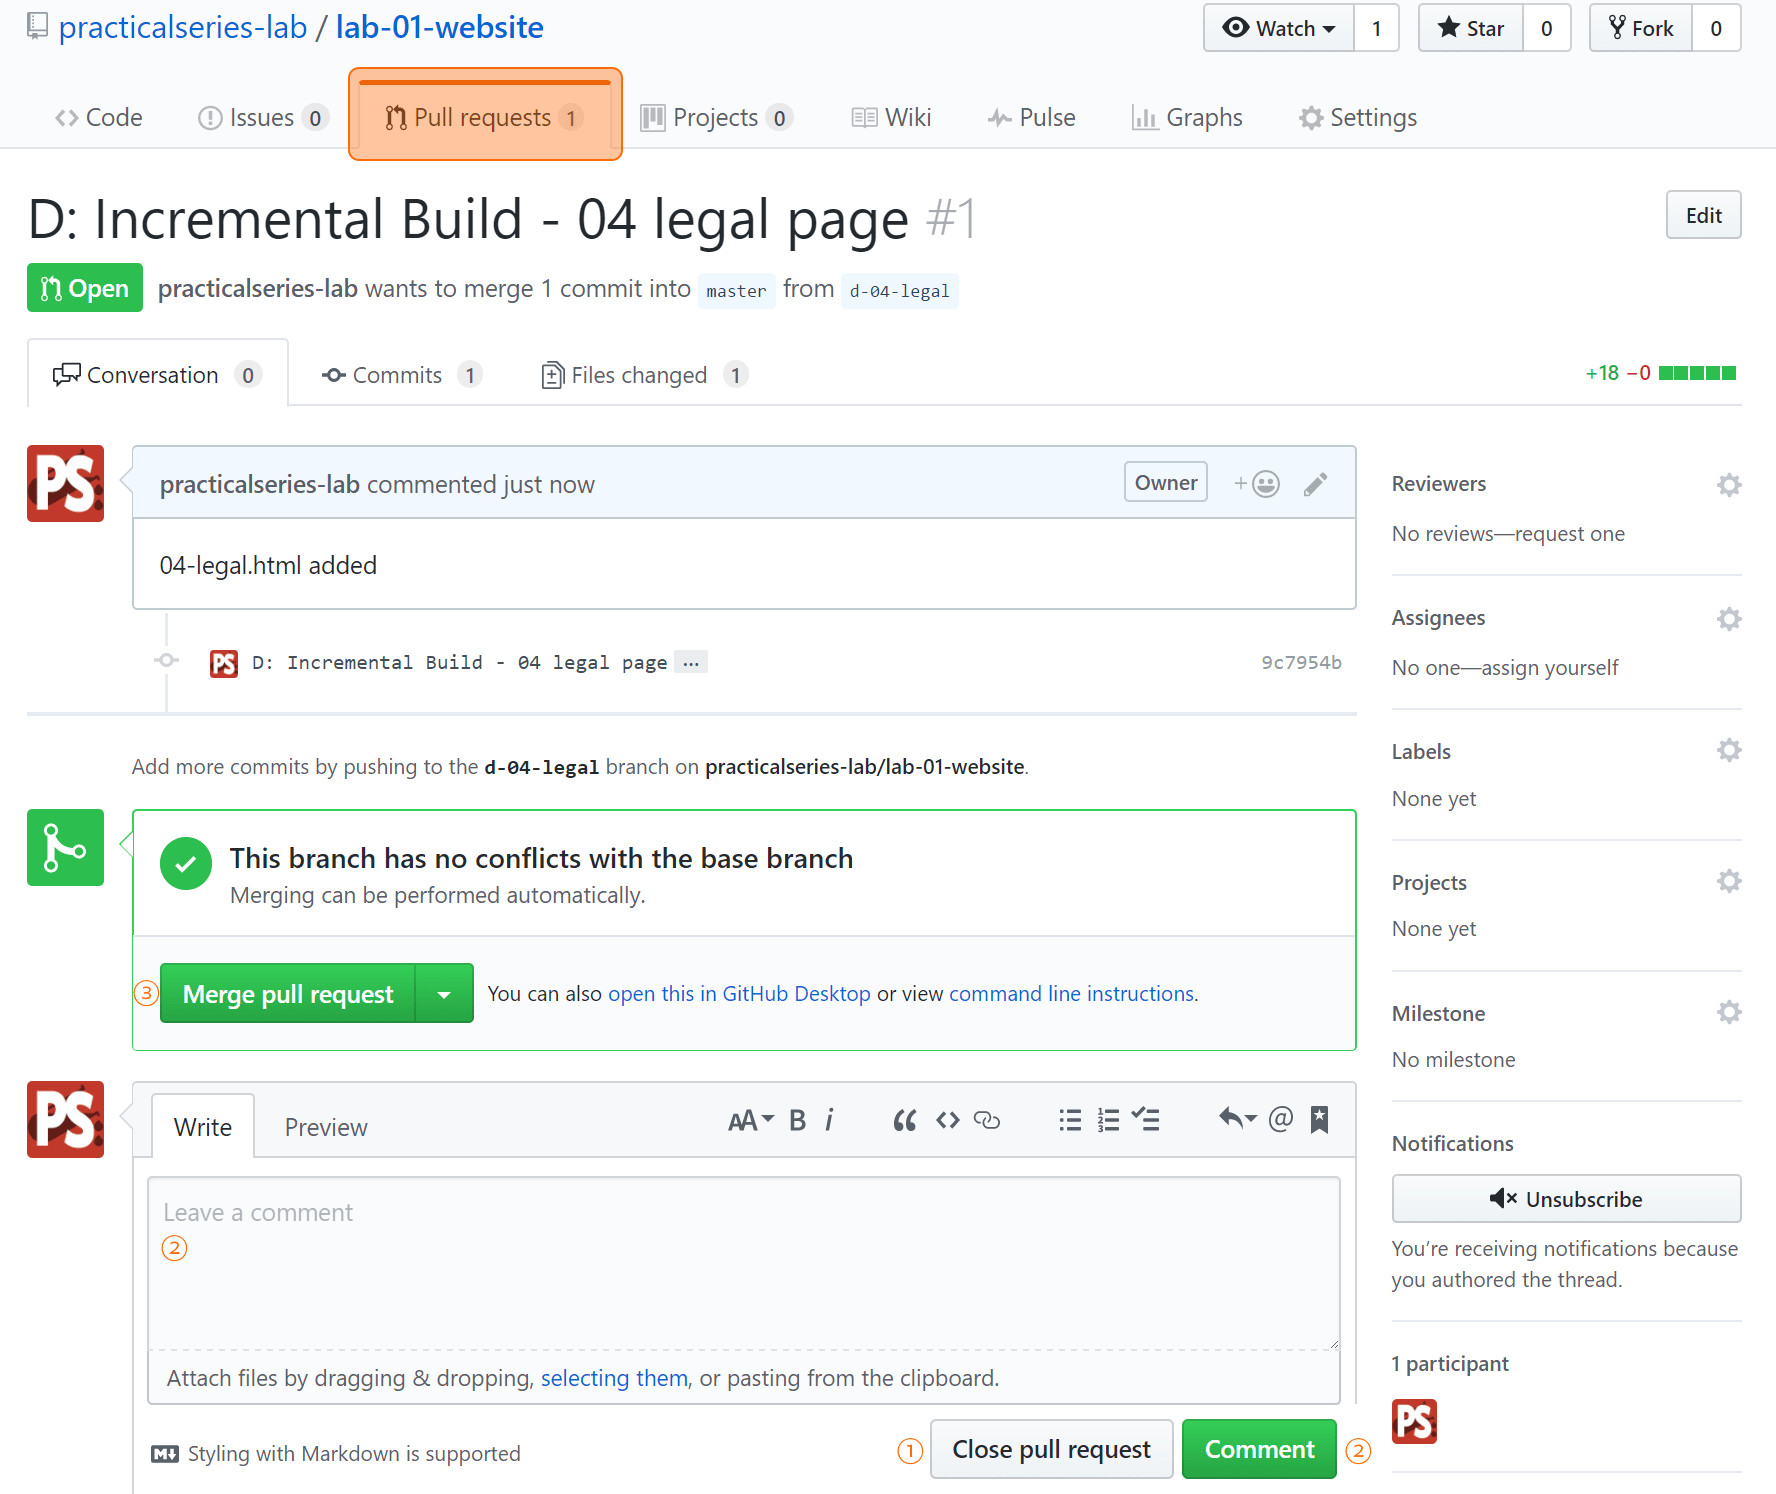
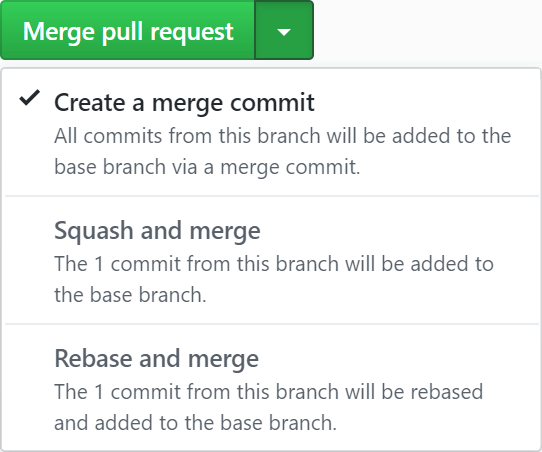
By way of example, I will add a new legal page to the website (04-legal.html) in much the same way I did with other pages in previous examples. I will do this by creating a new branch adding the page to the new branch and then merging it back into the master branch.

The easiest way to create a new branch is from the repository home page. Open the lab-01-website home page:

Figure 9.49 - GitHub—repository home page

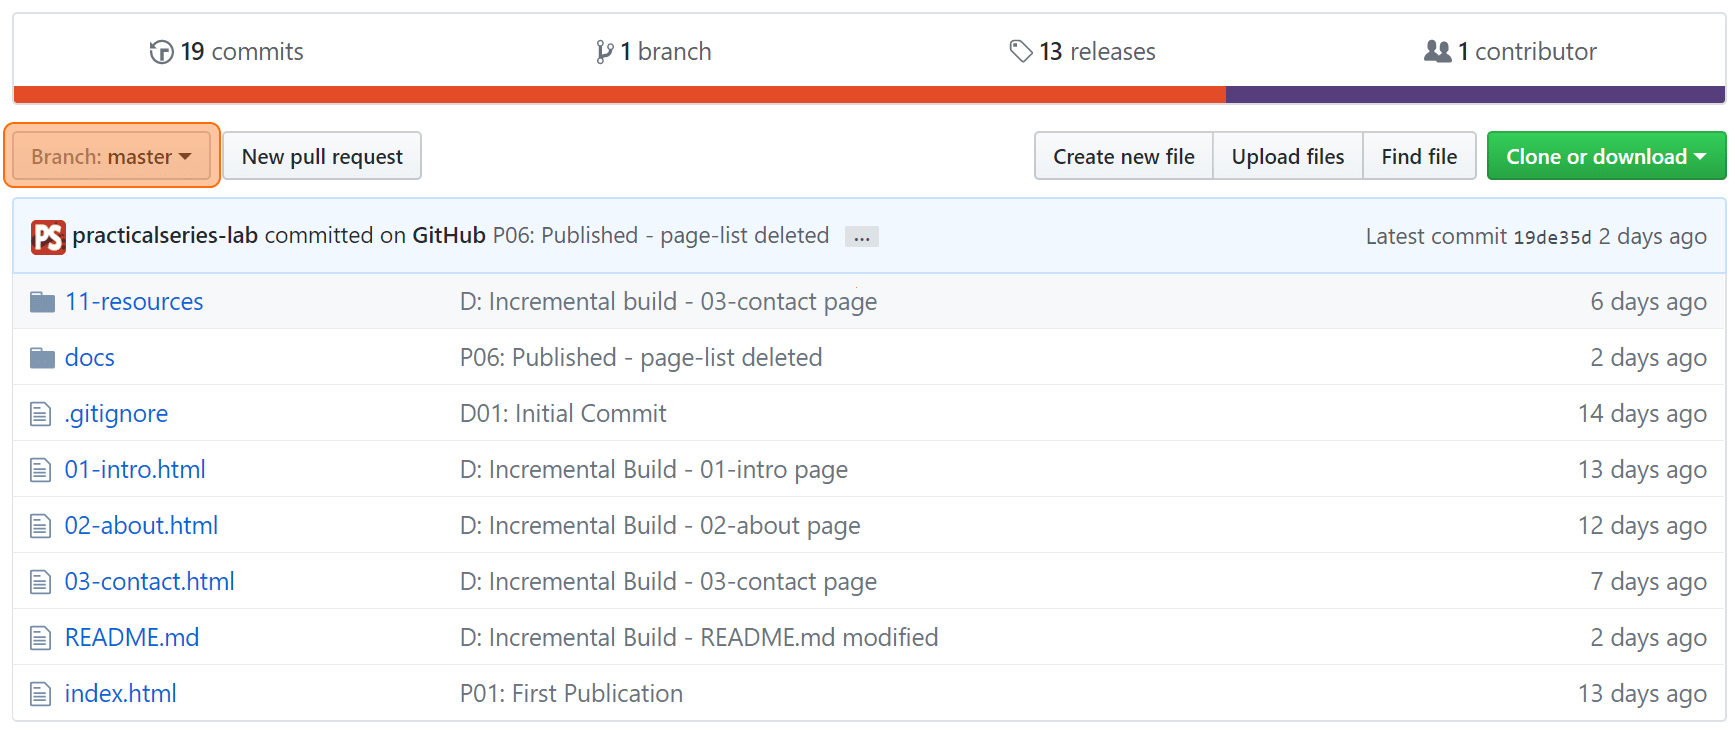
Figure 9.49   GitHub—repository home page

Click the branch button to open the branch dropdown box:

Figure 9.50 - GitHub—branch dropdown box unpopulated

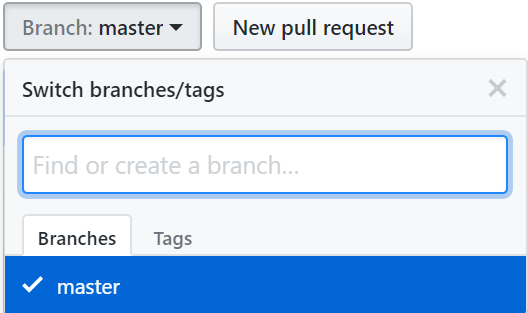
Figure 9.50   GitHub—branch dropdown box unpopulated

In the find or create a branch box start typing the name of the branch to be created, in this case it is d-04-legal.

Figure 9.51 - GitHub—branch dropdown box create branch

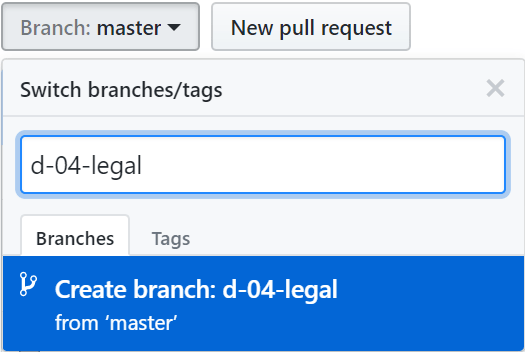
Figure 9.51   GitHub—branch dropdown box create branch

If the branch already exists, GitHub will try to switch to it (hence the find), in our case the branch does not exist and GitHub is telling us it will create a new branch called d-04-legal from the latest commit on the master branch (the blue bit at the bottom, Figure 9.51). Hit return to create the branch; GitHub will open the branch page for d-04-legal:

Figure 9.52 - GitHub—d-04-legal home page

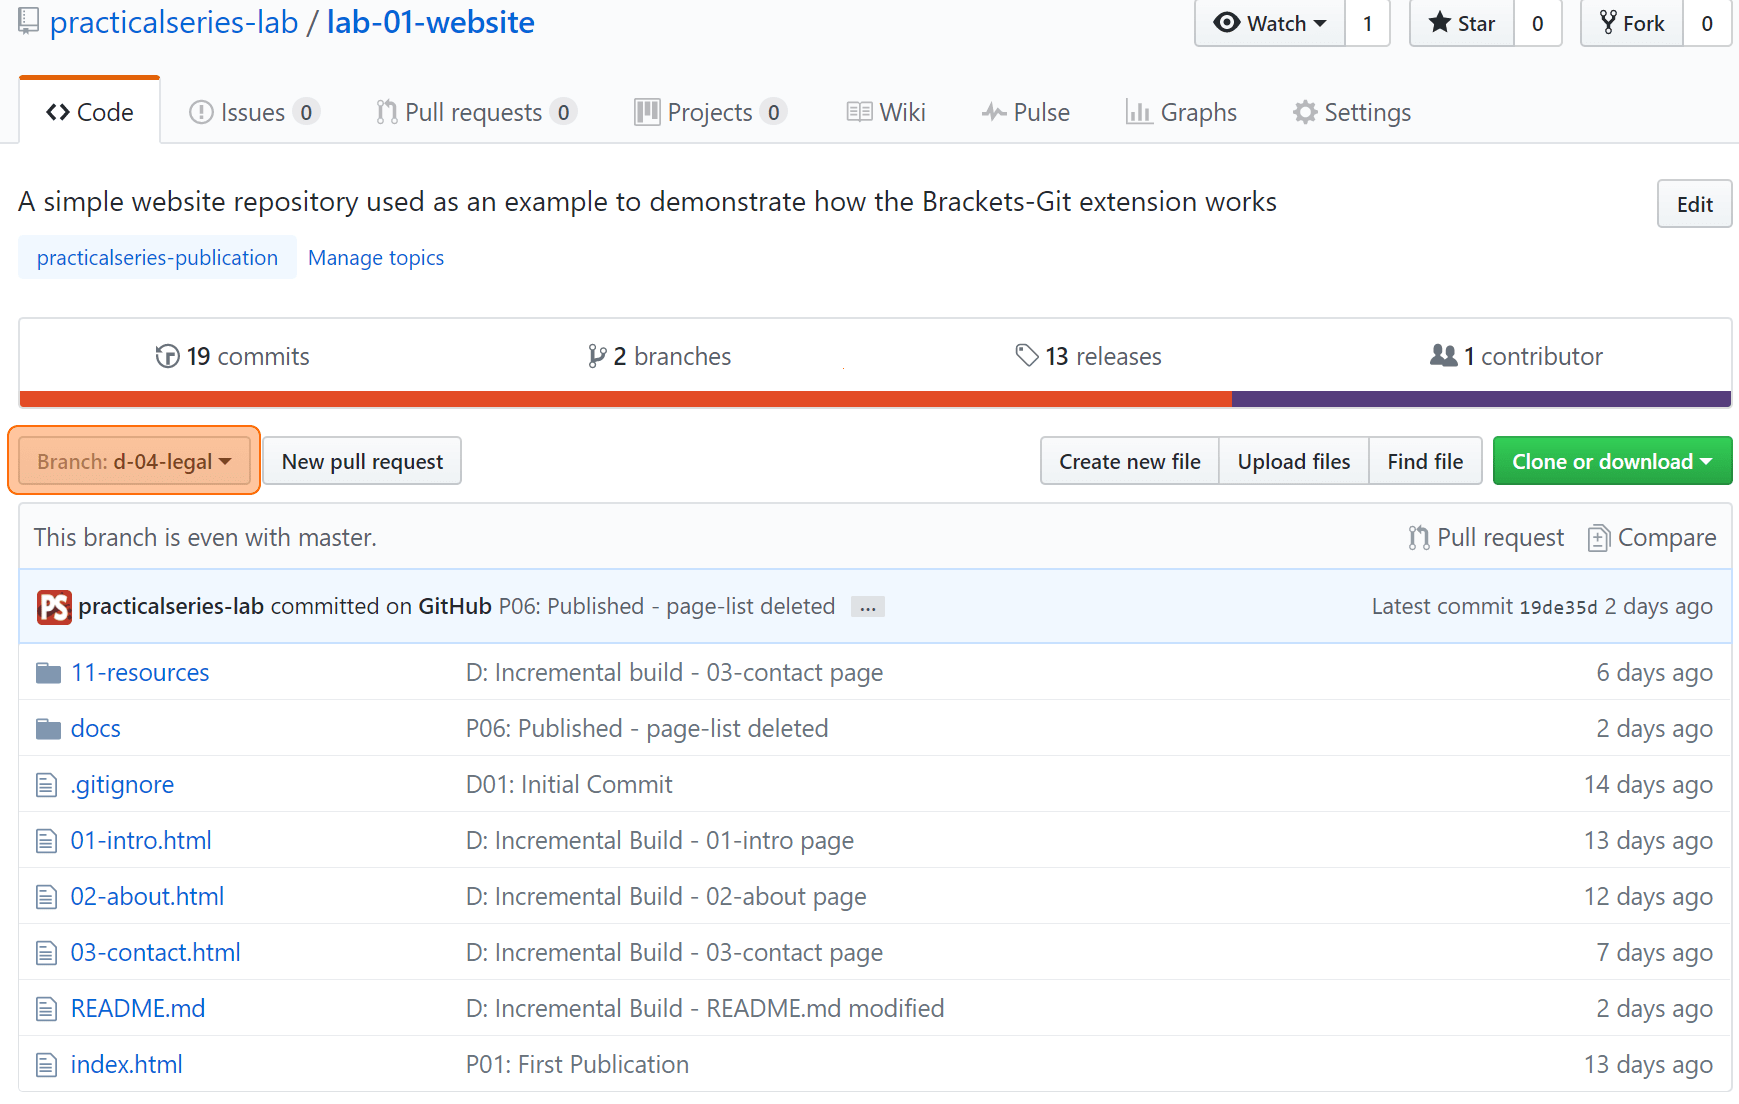
Figure 9.52   GitHub—d-04-legal home page

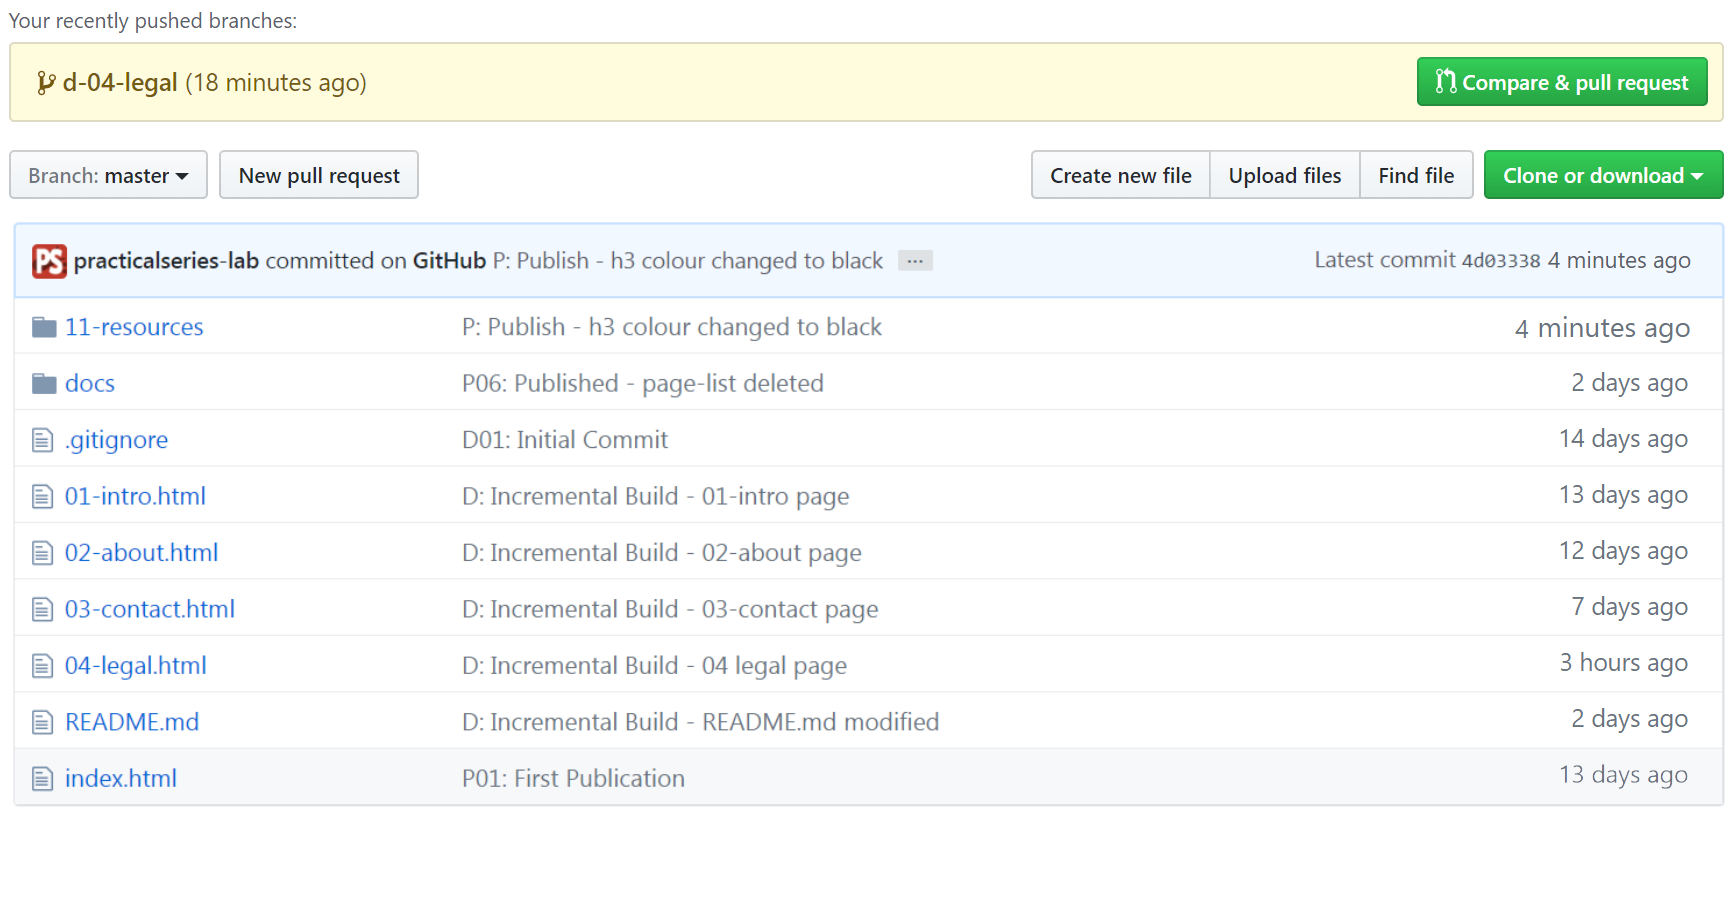
The branch button is now telling us we are on a new branch called d-04-legal. The commit number has not changed (we are still pointing to the latest commit on the master branch, see Figure 9.49).

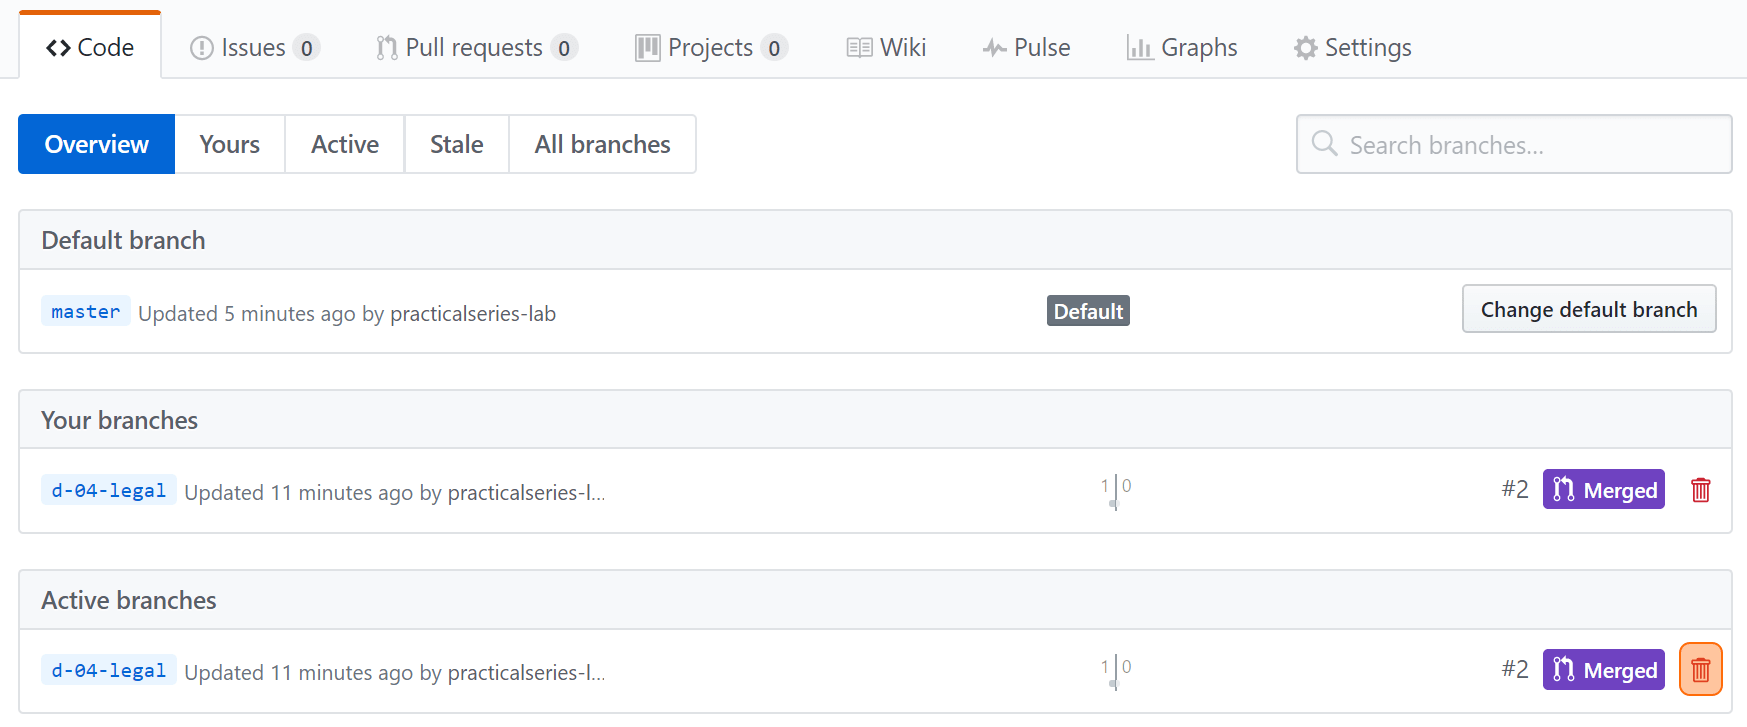
  • Although we are now on a new branch, the default branch (GitHub has a default branch) is still the master branch. This means that if your return to the repository home page, GitHub will transfer you back to the master branch (the default branch) and you will have to reselect the new branch if you want it.

It will catch you out (at least it does me) and you will find yourself on the wrong branch. It is possible to change the default branch, see § 9.5.6.

That’s it; we’ve created a new branch and switched to it.

9.5.2

Creating a file on the new branch

From the d-04-legal branch page, click the create new file button.

Call the new file 04-legal.html and add the following code:

04-legal.html
<html lang="en">                     <!-- Declare language -->
    <head>                           <!-- Start of head section -->
        <meta charset="utf-8">       <!-- Use Unicode character set  -->

<link rel="stylesheet" type="text/css" href="11-resources/01-css/style.css">

        <title>PracticalSeries: Git Lab — legal</title>
    </head>

    <body>
        <h1>A Practical Series Website</h1>

        <h3> Legal Declaration </h3>

        <p>This page contains the legal information for the website.</p>

    </body>
</html>
Code 9.2   d-04-legal branch—create new file: 04-legal.html

And give it the commit message:

D: Incremental Build - 04-legal page

04-legal.html added.

It should all look like this:

Figure 9.53 - GitHub—add a page to the d-04-legal branch

Figure 9.53   GitHub—add a page to the d-04-legal branch

Click commit new file to add the file to the repository. This takes us back to the branch page Figure 9.54.

The new commit point is, in my case [9c7954b]; the new file 04-leagl.html is also visible.

Figure 9.54 - GitHub—d-04-legal branch page with new file

Figure 9.54   GitHub—d-04-legal branch page with new file

The yellow bar informs us that the d-04-legal branch has just been pushed to the repository—technically it hasn’t been pushed, we did in GitHub directly in the remote repository

There is also a message just above the blue commit line; it says this “branch is 1 commit ahead of the master”, this all makes sense.

Wherever you look there are also prompts for pull requests. Let’s look at that next.

9.5.3

Merging branches with a
pull request

GitHub uses (by and large) public repositories—all the repositories we’ve looked at so far have been public repositories. This means that anyone can see them and can copy them.

People can even copy them with the intention of developing them further (this process has the rather vulgar name of forking†1 and I discuss how it works in § 10.1). Now, it is generally difficult to stop people doing this and GitHub (I think) actively encourages it (it is possible to block users, but this is intended only for abusive users and not just to stop people looking—it would be difficult to block every user of GitHub).

Clearly, though we don’t want every Tom, Dick or Harry modifying our code—hence the pull request. This allows some other user to take your code, modify it in their own account, and, if they think it’s good enough, send you a pull request with their changes.

The pull request alerts you to the fact that someone has made a modification and they are requesting that you pull their modification in to the repository. Only the owner (or those users given write permission to the repository) can grant this pull request and merge the modification into the repository.

Now in our example here, I (the owner of the repository) made a change to a particular branch; there has been no forking of the repository, no one has copied it and there is no communal working—just me adding a file. So why, you may wonder, is it banging on about pull requests?

The answer is it uses the same process no matter where the change originated (be it some other user who had copied, forked, the repository or me, the owner of the repository, making a change). So we use a pull request to merge the files.

Let’s do it.

†1 I generally don’t like the names that Git and GitHub use, I think them all coarse, crude and vulgar; but then I’m English and we’re taught good manners from an early age.

Creating a pull request

From the branch page click either the compare and pull request button in the yellow bar or the new pull request button next to the branch button. They both do exactly the same:

Figure 9.55 - GitHub—d-04-legal initiate a merge (pull request)

Figure 9.55   GitHub—d-04-legal initiate a merge (pull request)

This takes us to the open pull request page Figure 9.56 (I haven’t shown all of the 04-legal.html file, the stuff in green—there was too much of it):

Figure 9.56 - GitHub—open a pull request page

Figure 9.56   GitHub—open a pull request page

The important bit is at the top:

Figure 9.57 - GitHub—pull request details

Figure 9.57   GitHub—pull request details

The base branch (master) is the branch to which the changes will be merged (the receiving branch as it were), the compare branch (d-04-legal) is the branch we are trying to merge from.

The bit following this, the ✔ Able to merge message is important, it tells us that there are no conflicts between the two branches (the branches can merge without issue).

There is not really anything else to add, the bit underneath, next to the user logo allows a message to be entered, by default it uses the commit message that was entered when the change was committed—add whatever additional information you require (in a pull request from another user, this would be where they explain what the change is and why it would be useful).

I’m just going to leave it with the default content. Click create pull request:

Reviewing the pull request

After creating a pull request, we’re taken to the pull request status page:

Figure 9.58 - GitHub—pull request status page

Figure 9.58   GitHub—pull request status page

At this point absolutely nothing has happened.

Pull requests

Pull requests are just that, a request absolutely nothing happens to the contents of the repository when a pull request is generated.

A pull request has been generated, but nothing in the repository has changed.

Making a pull request takes us to the pull request status page (Figure 9.58).The first thing to note is at the top (highlighted), we are in the pull request tab (we haven’t been here before). This is where all the open pull requests (wherever they were generated) are listed.

We just have one (hence the one in the tab), the one we generated above.

There are three things we can do with a pull request:

  1. Reject it (hit the close pull request button)

  2. Ask a question (enter text in the box and hit the comment button)

  3. Accept it (hit the merge pull request button)

Looking at these in turn:

Rejecting a pull request

To reject a pull request click the close pull request button, this is listed as point 1 in Figure 9.58. Closing a pull request does not delete it, it will be listed under closed pull requests, but it will stop it bothering you and it will not require any further interaction.

  • It is not possible to delete pull requests, they hang around as closed pull requests, they are not generally visible, but you can search for them.

A note of caution: closing pull requests can upset some people, some people don’t handle rejection well—best to let them down gently—as someone once said:

“never argue with strangers on the internet”

Starting a conversation

Next, the conversation. If you notice, we are actually in a sub-tab called conversation, it’s just under the green open image (open icon).

If you’re not sure about the pull request you can ask questions or make a statement “good idea, I’ll implement later”—or in my case “who are you? Stop bothering me. Go away”—type what you want in the box at the bottom and click the comment button (both labelled point 2 in Figure 9.58) and the message will be added to the pull request listing.

Accepting a pull request

The final option is to accept the changes. Click the merge pull request button point 3 in Figure 9.58.

  • Only users who are able to commit changes to the repository can do this.

The merge pull request button has various options:

Figure 9.59 - GitHub—pull request merge options

Figure 9.59   GitHub—pull request merge options

We want the default option, create a merge commit. This is in keeping with my idea of the best practice for merging branches. Generally, the top option is the correct one (and it certainly won’t do any harm).

Clicking merge pull request automatically generates a merge commit message (you can alter it if you want):

Figure 9.60 - GitHub—pull request merge commit message

Figure 9.60   GitHub—pull request merge commit message

I’m going with the default, click confirm merge.

This still leaves us on the pull request status page:

Figure 9.61 - GitHub—pull request status (post merge)

Figure 9.61   GitHub—pull request status (post merge)

We can now see the merged pull request in the pull request chain, it is telling us (next to the purple merge icon file icon) that the new commit is [6907e46]. At this stage the commit has been made and is in the repository.

However, GitHub (unlike Git and Brackets) has an undo button, the revert button will undo the change and take us back to the previous state (Figure 9.58). With GitHub we get to change our mind.

9.5.4

Examining previous
pull requests

We’ve merged a branch by using a pull request (merged the d-04-legal branch on to the master branch), we can see this if we open the repository home page; it shows the latest version:

Figure 9.62 - GitHub—repository home page (post merge)

Figure 9.62   GitHub—repository home page (post merge)

The master branch is now selected, the new 04-legal.html page is there and the latest commit is [6907e46]. There are still two branches (branches tab), this is because we haven’t deleted d-04-legal. The pull request tab is also showing no requests.

Click the pull request tab to open the pull request page:

Figure 9.63 - GitHub—pull request page (post merge)

Figure 9.63   GitHub—pull request page (post merge)

It is showing that there are no open commit requests and one closed request, the one we just made.

Clicking the closed tab (highlighted) will show the current status of the closed pull requests:

Figure 9.64 - GitHub—closed pull requests

Figure 9.64   GitHub—closed pull requests

If you click the pull request itself (where it says D: Incremental Build) it will show you the details of the pull request, this is the same as Figure 9.61. The revert option is still there if you want to undo the pull request.

9.5.5

Pull request to merge a branch with a conflict

The d-04-legal branch still exists, go back to the repository home page (Figure 9.62), click the branch button and select d-04-legal from the drop down to switch to that branch.

Figure 9.65 - GitHub—switch to d-04-legal branch

Figure 9.65   GitHub—switch to d-04-legal branch

Open the 11-resources folder and then the 01-css folder and finally open the style.css file:

Figure 9.66 - GitHub—style.css preview

Figure 9.66   GitHub—style.css preview

Click the pencil symbol ( edit icon 
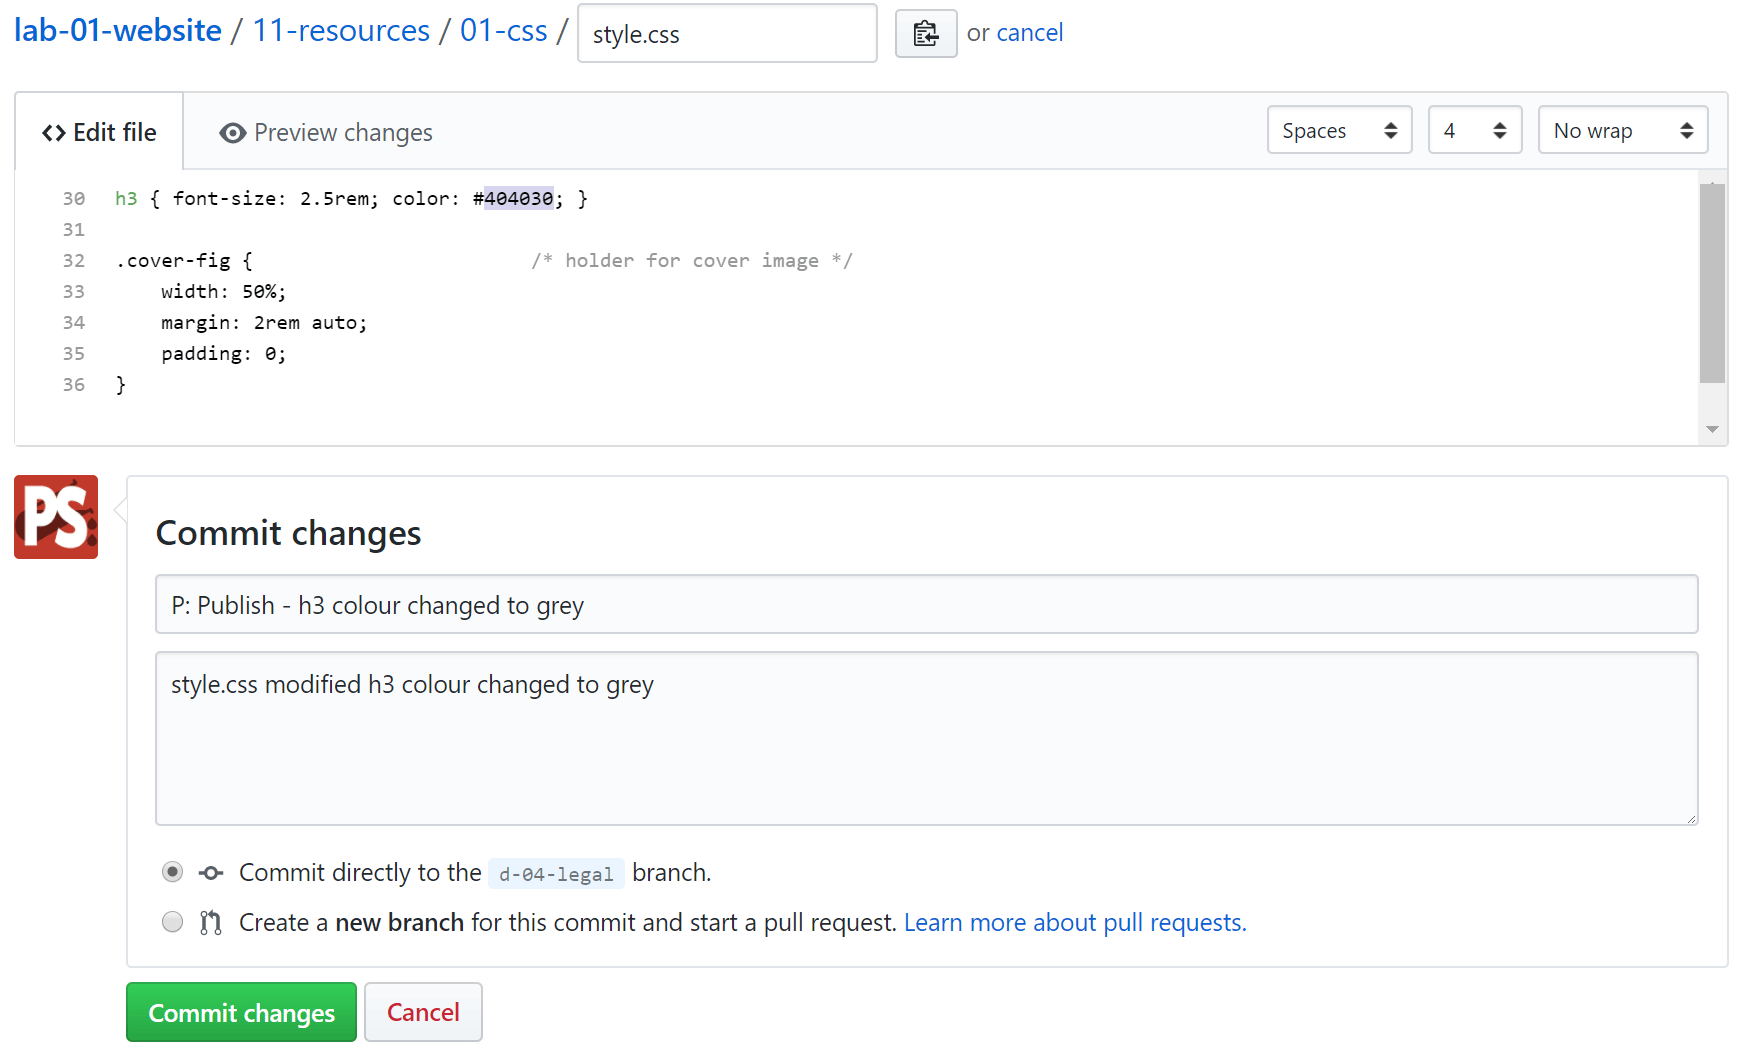
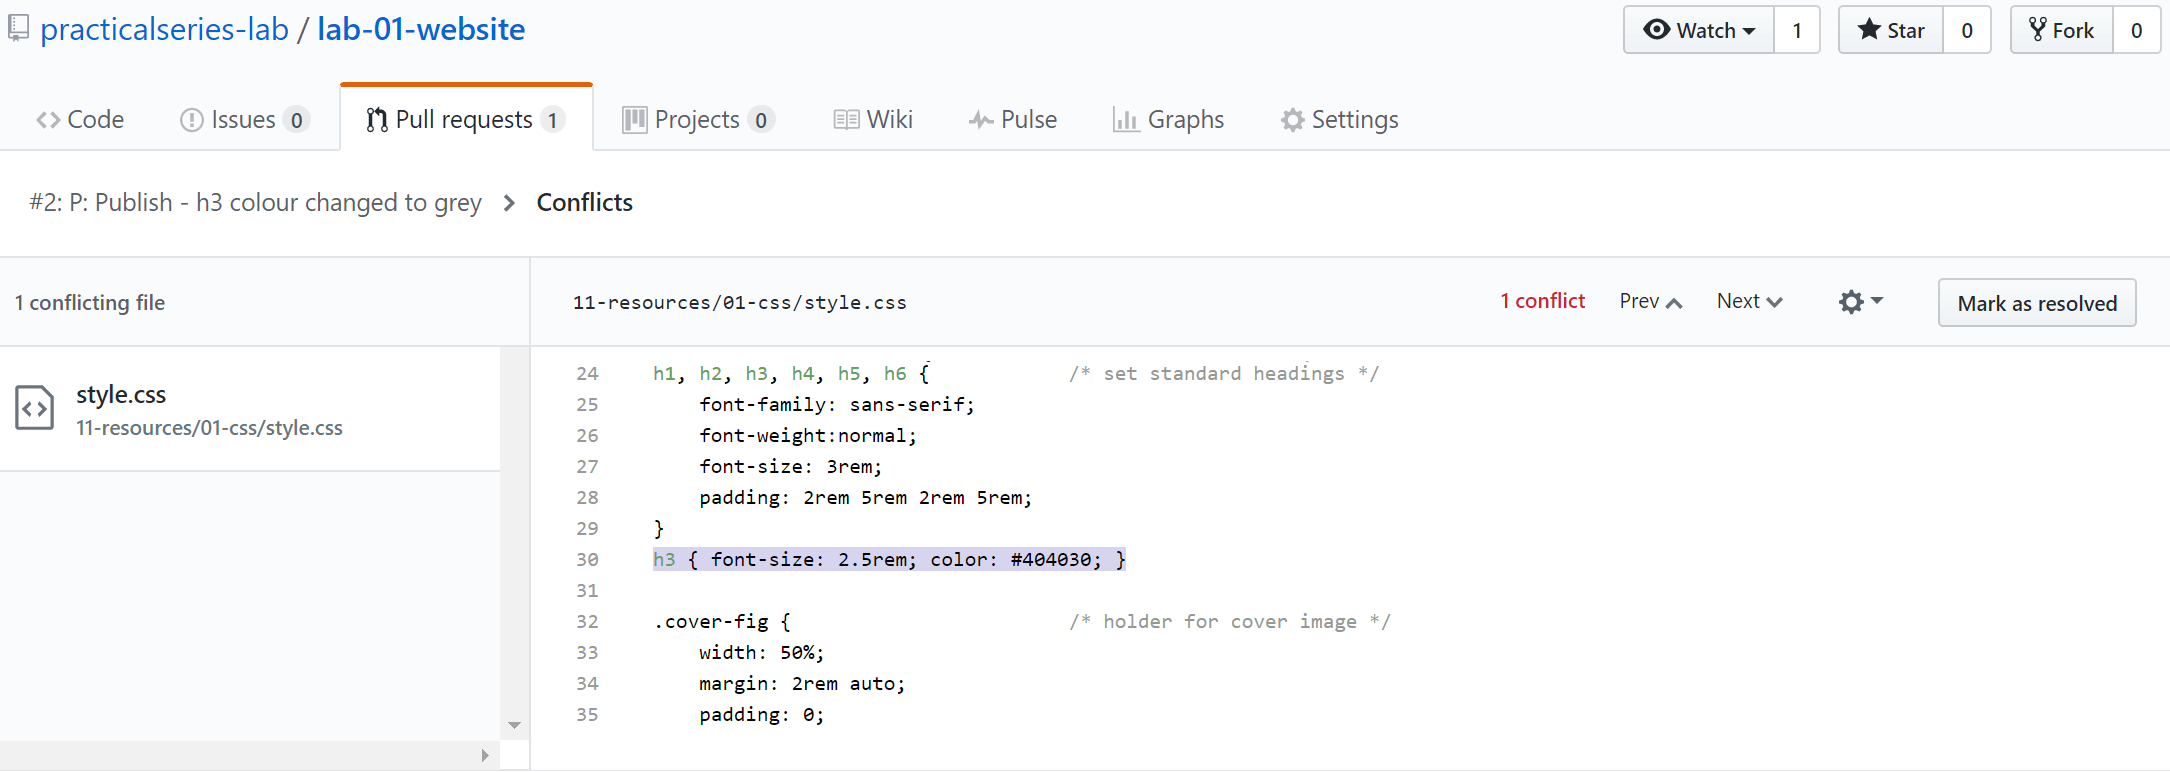
) to edit the file and modify line 30 as follows

h3 { font-size: 2.5rem; color: #404030; }
d-04-legal style.css change

It gives the h3 heading a grey colour.

The edited file looks like this, enter the commit message as shown:

Figure 9.67 - GitHub—style.css edited

Figure 9.67   GitHub—style.css edited

Click commit changes and then go back to the d-04-legal branch page. It will once again inform us that d-04-legal is one commit ahead of master:

Figure 9.68 - GitHub—style.css edited on d-04-legal

Figure 9.68   GitHub—style.css edited on d-04-legal

The next thing is to modify the master branch in just the same way to make a conflict (i.e. change the style.css file).

Go back to the repository home page and make sure you are on the master branch.

Drill down to the style.css file open it and edit it (in just the same way we did above for the d-04-legal branch above).

This time make line 30 read:

h3 { font-size: 2.5rem; color: #000000; }
master style.css change

The h3 element is completely black, it looks like this:

Figure 9.69 - GitHub—style.css edited on master

Figure 9.69   GitHub—style.css edited on master

Enter the commit message and commit changes.

Go back to the repository home page:

Figure 9.70 - GitHub—repository home page

Figure 9.70   GitHub—repository home page

Now we’ve change style.css on both branches and they have conflicting changes.

Let’s try to merge them together by creating a pull request. Click either the compare and pull request button or the new pull request button (they do the same thing). This time we get:

Figure 9.71 - GitHub—open pull request with a conflict

Figure 9.71   GitHub—open pull request with a conflict

Not looking so good this time.

The top bit is the same; we’re merging from d-04-legal to the master branch.

It’s the bit after that that is the problem ✖ Can’t automatically merge. But it does go on to say that we can still create the pull request; it just means we have to sort it out later.

The bit at the bottom shows the conflict (in case it can be fixed and the pull request redone). In our case I want to leave it, I want the conflict situation. Click the create pull request button and let’s see what happens:

Again we go to the pull request status page and this time we have:

Figure 9.72 - GitHub—pull request with a conflict

Figure 9.72   GitHub—pull request with a conflict

The merge pull request button is greyed out, but now we have a resolve conflict button.

As before, we could if we wanted, just reject the pull request by clicking the close pull request button. We could also ask questions with the comment button (just like last time).

What we’re really interested in is resolving the conflict, click the resolve conflict button—does it look familiar?

Figure 9.73 - GitHub—merge with a conflict

Figure 9.73   GitHub—merge with a conflict

It wants us to make the correction (just like § 6.7.3 & § 8.5). This time I’m going to keep the first one (grey). Modify the file to make it look like this:

Figure 9.74 - GitHub—modified file to resolve conflict

Figure 9.74   GitHub—modified file to resolve conflict

Click the mark as resolved button.

Now we get:

Figure 9.75 - GitHub—commit modified file

Figure 9.75   GitHub—commit modified file

Click the commit changes button and it takes us back to the pull request status page but this time it looks like it did in § 9.5.3, we can merge the changes:

Figure 9.76 - GitHub—pull request status page after conflict resolution

Figure 9.76   GitHub—pull request status page after conflict resolution

We do exactly the same as we did with the original merge, click merge pull request and in the message box, accept the default message by clicking confirm merge.

Figure 9.77 - GitHub—confirm merge after conflict resolution

Figure 9.77   GitHub—confirm merge after conflict resolution

And that’s it, it’s committed. It will leave you on the pull request status page showing the closed pull request. All done.

9.5.6

Deleting a branch

The final thing with branches. Deleting the branch

Go to the repository home screen and click the branches tab (highlighted):

Figure 9.78 - GitHub—select the branches tab

Figure 9.78   GitHub—select the branches tab

It opens the branches page:

Figure 9.79 - GitHub—delete a branch from the branches tab

Figure 9.79   GitHub—delete a branch from the branches tab

To delete the branch just click the rubbish bin (highlighted), it will do it straight away (there is no “are you sure?” box). It does however give you the option to restore it afterwards.

  • This is also where you can change the default branch, click the button.


End flourish image