4.3.1
Creating an SSH key pair
Start Git Bash (yes we’re back here again).
This will start in the default directory; earlier, in § 3.3.1, I set this to be:
D:\2500 Git Projects
You probably have a different directory, but I’ll run through it on my machine.
This is what I have (Figure 4.13):
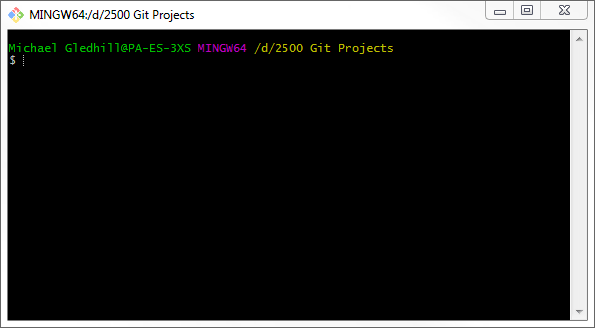
Figure 4.13 Git Bash home directory
Now, while this is the directory we want for our repositories, it is not the place to put the SSH keys, these have to go in the user directory for the current user. In my case, this is (if you remember from § 3.3):
C:\Users\Michael Gledhill\
The easiest way to do this is to, open a Windows command prompt ( then type in the box). This will open a Windows command prompt and it will be set automatically to the correct directory. Mine looks like Figure 4.14:
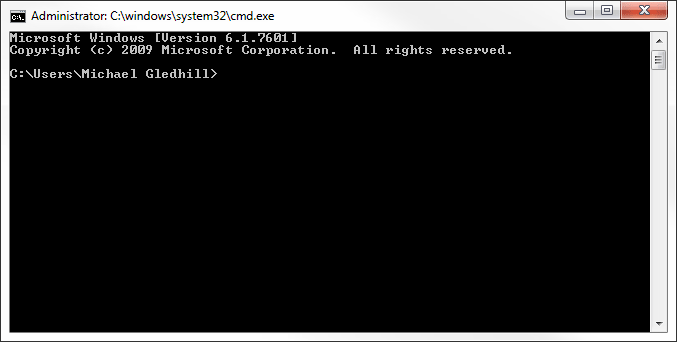
Figure 4.14 Windows command prompt and home directory
Yours will be different but will be similar (probably something like this):
C:\Users\<username>\
We need to create a directory to store the SSH keys. This directory should be called .ssh (note the leading full stop). To create the directory, enter the following command in the Windows command prompt (obviously, don’t enter the C:\Users\Michael Gledhill> bit, just the stuff after it):
| C:\Users\Michael Gledhill> mkdir .ssh |
To see if its worked, enter:
| C:\Users\Michael Gledhill> dir |
This will list the directories in the user folder; I have this (I’ve highlighted the new folder in orange .ssh, Figure 4.15):
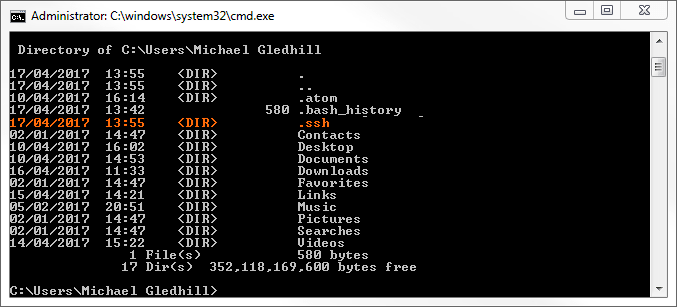
Figure 4.15 .ssh directory in the users folder
That’s all we need, close the Windows command prompt by clicking the cross at the top.
- You can’t do all of this from Windows Explorer, Explorer won’t let you create a file starting with a full stop (thinks it hasn’t got a filename).
Go back to the Git Bash window we opened earlier.
The next thing is to use the SSH keygen command to create the keys. Enter the following:
| $ | ssh-keygen -t rsa -C "your_email@something.com" |
Use the email address you associated with your GitHub account. In my case I used lab@practicalseries.com. So I entered the command:
| $ | ssh-keygen -t rsa -C "lab@practicalseries.com" |
I’ll go through what happens step by step. Enter the above command and hit return. You will get the following response (or something similar):

It’s saying it wants to save the file in the .ssh directory we just created and that the keys will be in files called id_rsa. Hit return:

Now it’s asking for a passphrase, this is an additional layer of security. If you enter a passphrase†1, you will be prompted for it whenever you connect to the remote repository. I find this too annoying, so I don’t use a passphrase.
| †1 | An SSH passphrase is a phrase that is known only to you and is used to encrypt your private SSH key, a passphrase should be at least 15 characters in length, contain upper and lower case letters, numbers and punctuation. Something like: H3ct0r & H3nry aRE Stup1D d0g5. It needs to be something you can remember. | ||
| If a passphrase is not used, anyone who has access to your computer or your private SSH key can gain access to your repositories. If a passphrase is used, then the private key is further encrypted and is useless without the passphrase. | |||
If you want to use a passphrase enter it now, hit return and enter it again. If you don’t want a passphrase just press return twice. Now you will get something like this:
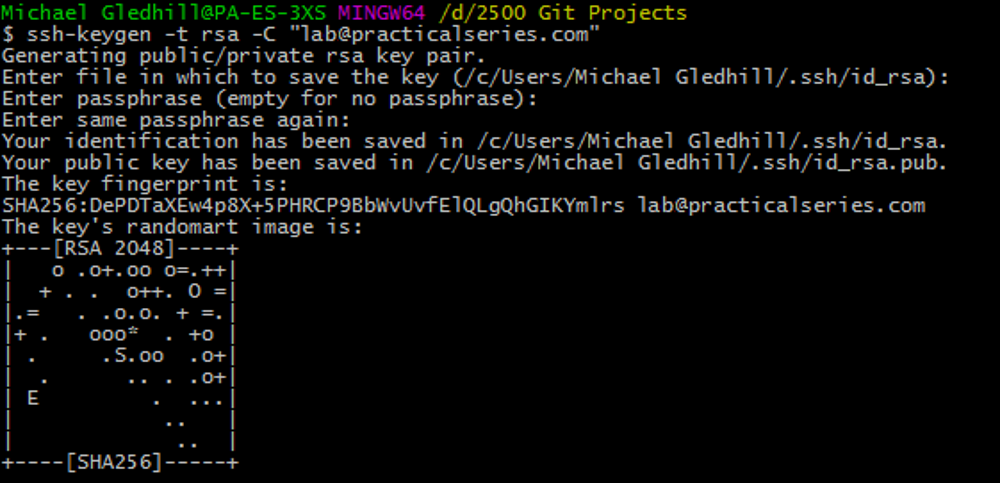
Figure 4.16 .ssh public and private key creation
What this means is that the private key has been saved in the file id-rsa and the public key in the file id_rsa.pub. Both files are in the .ssh directory we created earlier.
The key finger print is a shortened version of the public key and is can be used to identify the key itself—a bit like the seven digit short hash key rather than the full 40 digit hash for a commit.
The randomart image is a mechanism that allows two keys to be compared by eye (rather than comparing a long string of numbers and letters).
- This isn’t actually my SSH key—I’m not that stupid, this is one I made just for demonstration purposes.
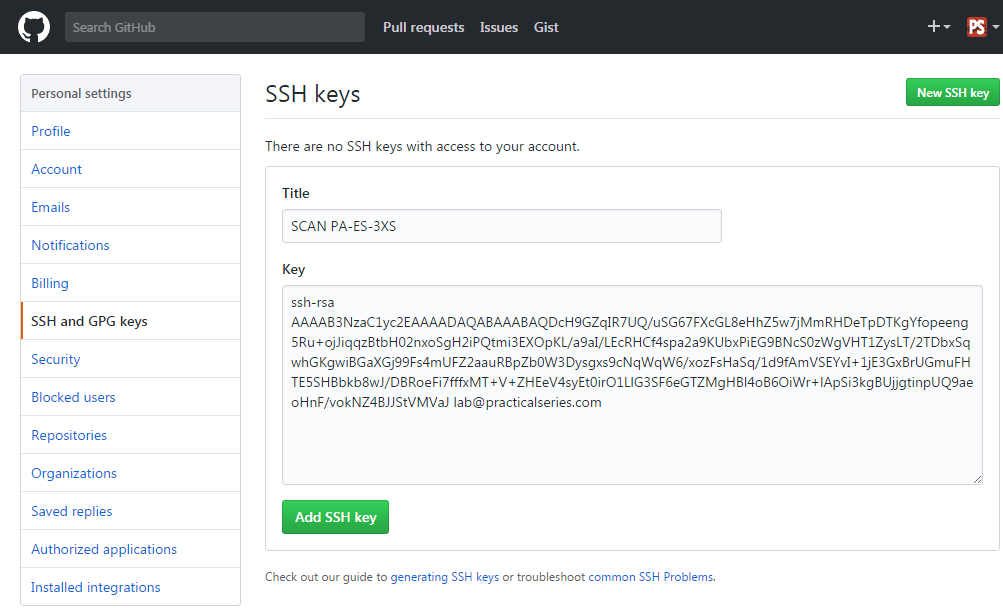
The only bit of this we need is the path to the public key, it’s highlighted in Figure 4.17:
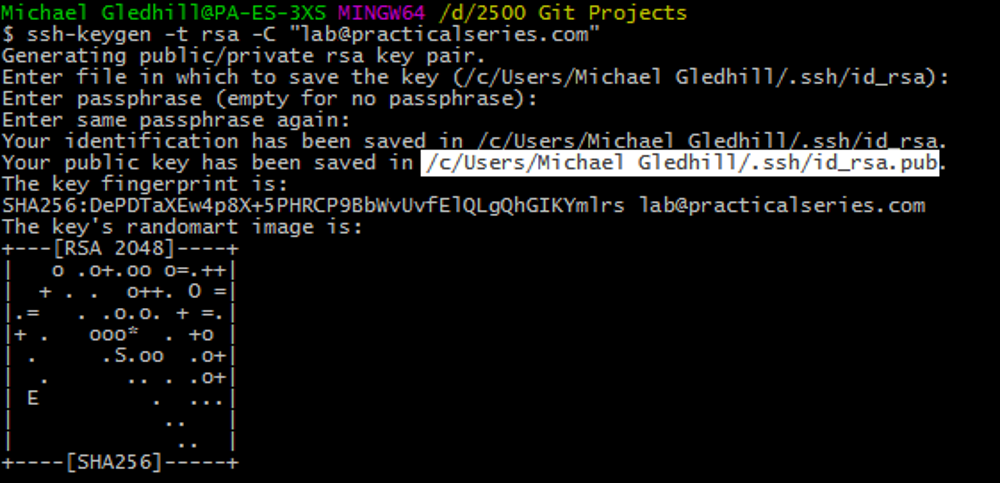
Figure 4.17 Public key including its path
We need to open this file in a text editor, the easiest way is to highlight the path in the Git Bash window and copy it (either right click and select copy or hit ctrl+insert).
Enter the following command (obviously with your own data):
| $ | npp "/c/Users/Michael Gledhill/.ssh/id_rsa.pub" |
To do this enter npp " then paste in the copied path and filename (right click and select paste or hit shft+insert) followed by a closing quote ", like this:
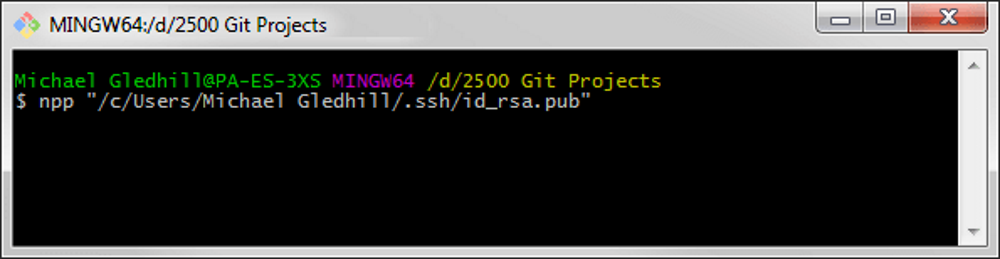
Figure 4.18 Open the public key in Notepad++
Alternatively navigate to the path in Windows Explorer, right click the file and select
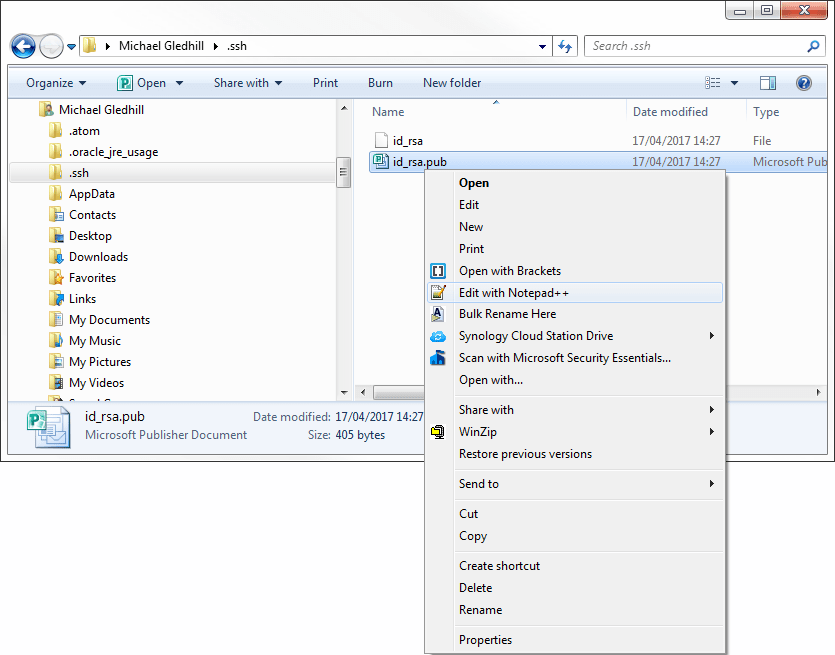
Figure 4.19 Open public key from Windows Explorer
Either way, the file will open in Notepad++. It will look like this:
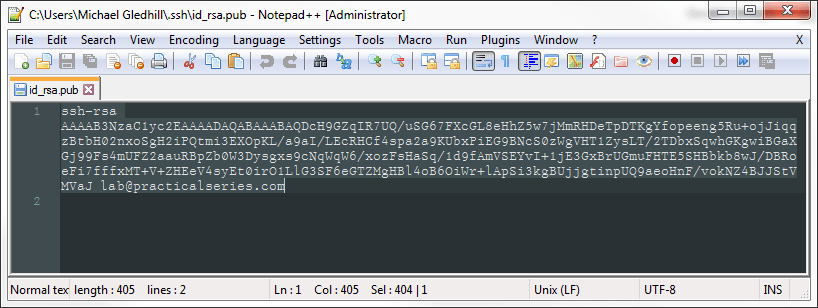
Figure 4.20 The SSH public key in Notepad++
If you can’t see it all, if it disappears off the right hand side of the screen, you need to turn on word wrap, click the  icon (or , about a quarter of the way down).
Select all the text, from the first s of ssh to the last character of the email address and copy it to the clip board (, or ). Now you can close the file.