Well, I can’t tell you what your website should be about.
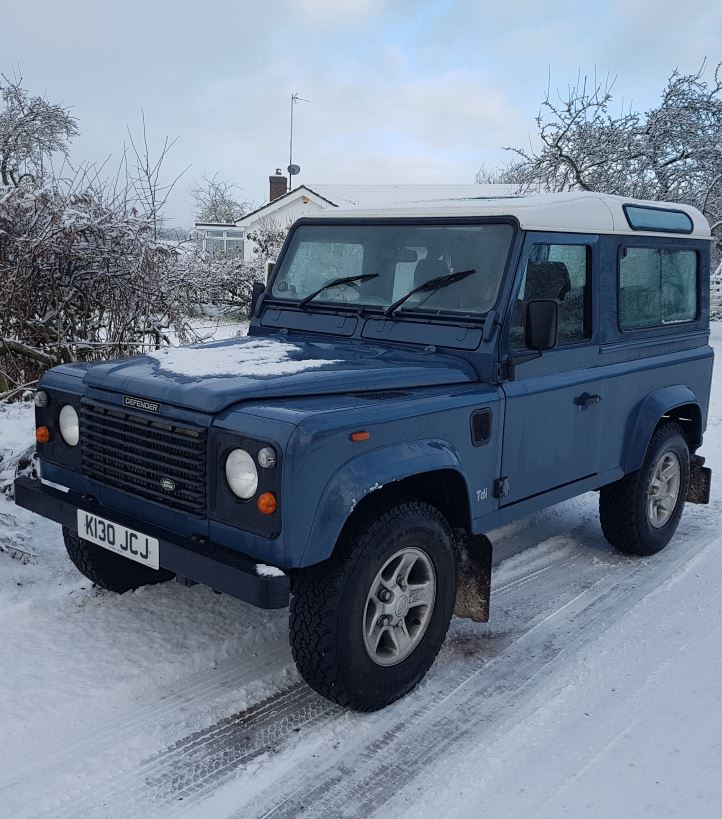
I do have some ideas — Saluki dogs seem to be popular — people always like pictures of dogs, Land Rovers are also popular, here’s a couple of pictures to get you started:
Figure 25.1 Henry Gaius happy in the snowFigure 25.2 Hetty the Landy also happy in the snow
At the end of this I’ll include a proper picture of the dogs where they look... er, well, more like dogs and not strange alien creatures.
Apparently pornography is popular too, I’ll let you take your own pictures.
Now, while I can’t tell you what your website should be about, I can offer some pearls of wisdom about how to produce it.
25.2.1
Writing the website content
I can’t stress strongly enough:
do not write the website content directly in the text editor
If you do it will be full of typing errors.
The best way to write the content for a website is in a word processor, as I said earlier (§ 1.4.2) I use Microsoft Word (specifically Word 2010).
The whole explanatory website (where you downloaded this template) is written in Word. It looks like this:
Figure 25.3 Extracts from the Word document for the explanatory website
If you have the pdf version of the website (I give it to all those who donate £5 or more), then you are essentially seeing the document that was written in Word.
There are several advantages to writing the website in Word†1, for a start it will highlight any spelling mistakes. But word does other things too, it will convert straight quotes to curly quotes, it changes dashes to em-dashes where appropriate, it allows all the styling we want on the website: tables, numbered lists, headings &c.
It also divides the website up into the correct chapter, section and subsections; and it allows everything to be given a number (figures, tables, code fragments, equations &c.) and this makes it easier to keep track of things on the website.
My original though when I started all this, was that I wanted a website that could display a document and make it look something like a professionally produced Word document.
So write your website in Word.
There is one other great advantage to Word, let’s say you’ve written and published the website and everything is up and running.
You will at some point either notice a mistake on the web page (this usually happens when you haven’t looked at it for a while and you go back and notice all the things that escaped your proofreading the first time) or you might just want to change it.
At this point, I make the changes in the Word document (I up-rev it, as we engineers say), and then implement those changes on the website. Now Word allows me to make changes to the text and track those changes (I can see what I’ve modified and how it has changed). This makes it easy to change the document (with tracked changes) and then easily identify the bits of the website that need to change. Once I’ve made the same change on the website, I accept the change in the Word document and move on to the next change.
†1
It doesn’t have to be Word, any word processor will do. I use Word so I’m just going to use Word as the terminology — that said, the two files I’ve given you are Word files.
25.2.2
Configuring a web page
I suggest you strip everything out of the template that you don’t need, but leave the 98-00-blank and 99-00-typicals sections (these are useful, they hold basic pages and examples of all the other things that you will need, it’s handy just to copy the thing you need, a table for example, and then mess about with it on you web page until you get what you want). You can delete the blank and typicals pages when you’ve finished your website.
Copy the 98-00-blank.html page and rename it for the page you are configuring, let’s say 05-00-testpage.html.
Now we need to create a 01-pages/05-00-testpage folder and get the necessary files:
Copy the 01-pages/cc-ss-pagename folder and rename it as (in this case): 01-pages/05-00-testpage.
In the 01-pages/05-00-testpage/01-local-css folder rename cc-ss-codelines.css as 05-00-codelines.css.
In the 01-pages/05-00-testpage/01-local-js folder, rename cc-ss-scroll.js as 05-00-scroll.js.
We now have all the necessary files and folder for the new page.
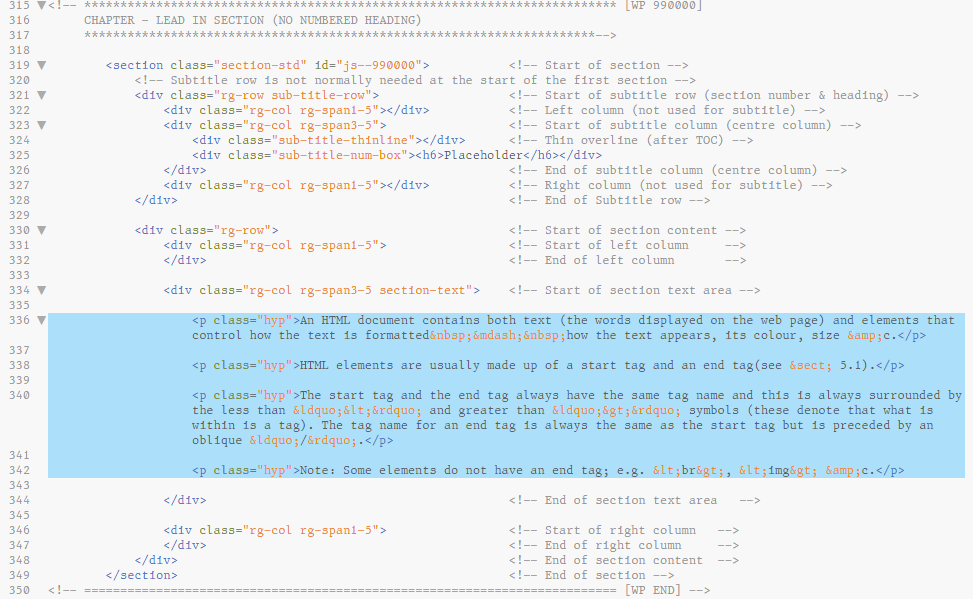
Next, open the new 05-00-testpage.html in brackets, using the blank sections that are in there, configure the first section you need: give it a heading, renumber the IDs add the correct meta tags at the start, add the previous and next links in the navigation bar and create the TOC (or copy it from another section if it already exists) &c.
I find it easier to do just one section at a time.
Once you have an empty section, waiting for some text, it is time to transfer the content from your Word document to the website.
25.2.3
Transferring the Word content to the website
Having written your website in Word, extensively proofread it and given it to other people to comment on (and usually ignored whatever they’ve told you). You are ready to convert it to a website.
To do this you are going to need to use that conversion document that you downloaded as part of the web template:
ps-html-conversion.docm
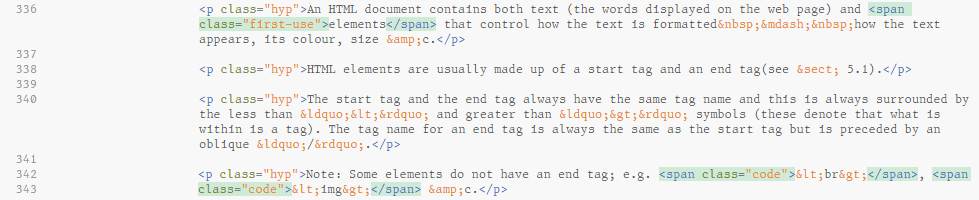
Look at the following extract from a Word document:
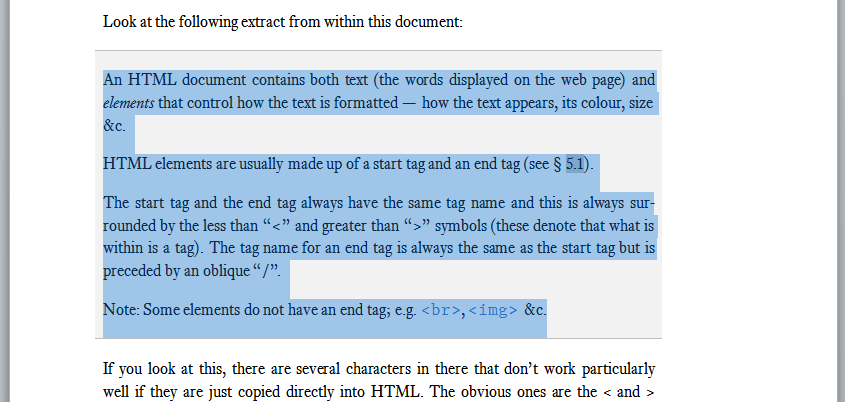
An HTML document contains both text (the words displayed on the web page) and elements that control how the text is formatted — how the text appears, its colour, size &c..
HTML elements are usually made up of a start tag and an end tag (see § 5.1).
The start tag and the end tag always have the same tag name and this is always surrounded by the less than “<” and greater than “>” symbols (these denote that what is within is a tag). The tag name for an end tag is always the same as the start tag but is preceded by an oblique “/”.
Note: Some elements do not have an end tag; e.g. <br>, <img> &c.
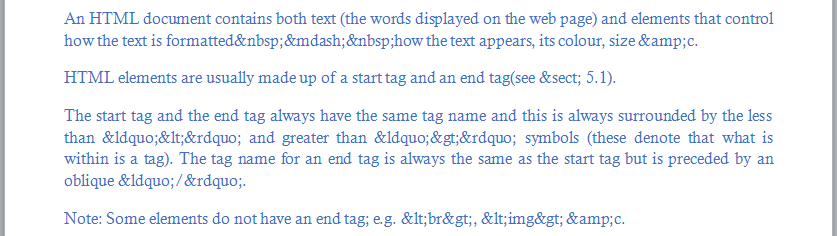
If you look at this, there are several characters in there that don’t work particularly well if they are just copied directly into HTML. The obvious ones are the < and > characters, other less obvious ones are the curly quotes, these have to be entered with &codes (see § 6.11) as does the & (of &c†2.) as well as the section mark §.
There are also other characters, there is an em-dash (a wide dash) in the first paragraph, and there are some invisible “non-breaking spaces”, these are usually inserted where things should not break across lines, the most common being after a section mark (§), it is not usual to allow the number to separate from the section mark. The same is true of numbers and their units.
The long and short of this is that we can’t just copy text from a Word document and stick it between <p>...</p> tags. We need to make it HTML friendly first
To do this you need your Word document with the website content in it open and the conversion document (above) also open with macros enabled (if it asks you, it depends on your Word settings, if you have macros enabled or not).
†1
Why do I use &c. instead of etc.? Well, because I’m old and it is what I was taught at school.
Etcetera is the Latin phrase Et cetera (lit: “and other similar things”), et being the word “and”, this is where our ampersand comes from, it is a joining of the e and t into one symbol.
The process is a follows:
Select the text that you want to convert in your web content document (I tend to do a page at a time):
Copy the text and paste it into the conversion document and select it again:
With the text selected in the conversion document press ctrl+alt+R to run the conversion macro:
Now copy each paragraph in turn and paste it in between <p> tags in brackets:
1 The last thing to do is add the <span> elements to apply the correct text formatting (the word elements in the first paragraph should be in italics, and the tags in the last paragraph in the code style, highlighted below):
2 Check the web page:
25.2.4
Images size and compression
If you are using images on your website (you almost certainly will be). These will probably be svg files, png files or jpeg files.
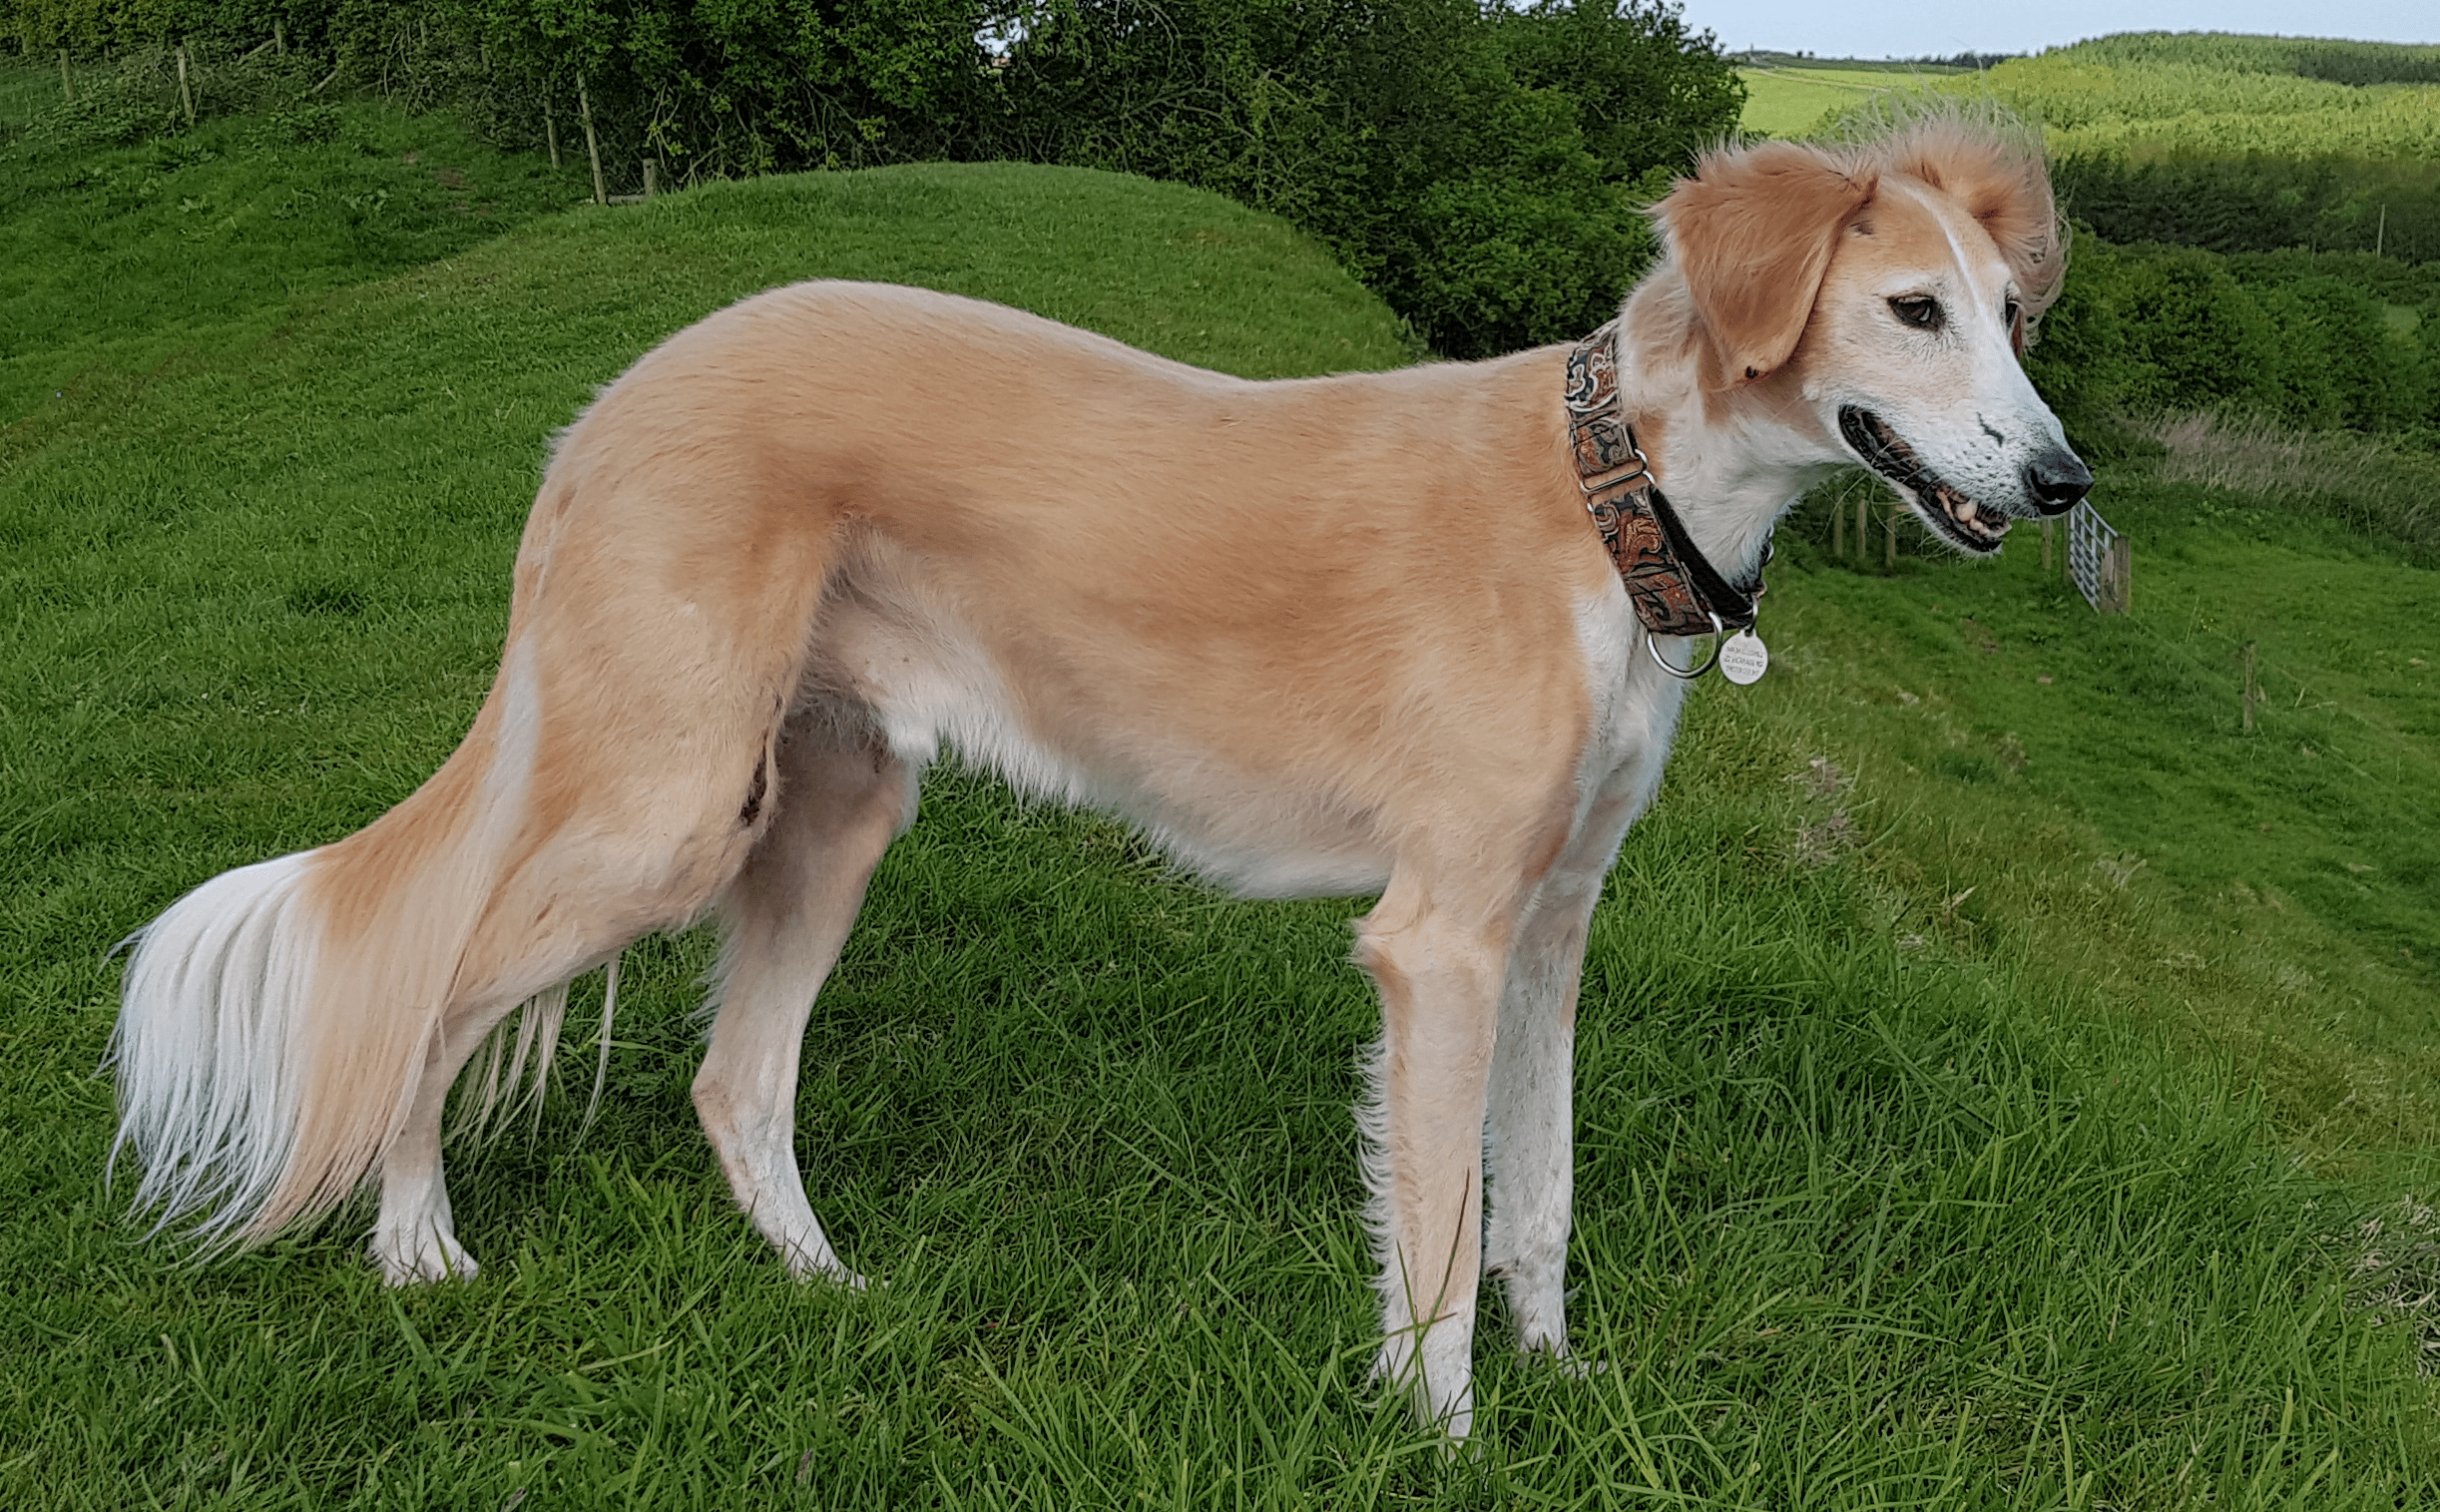
Images tend to be quite large files. Take the image of Henry at the start of the section, here it is:
Figure 25.4 Henry image 1511 × 1790 px — 4.77 MB
This image is a png file, in its native state it is 1511 × 1790 pixels and is 4.77 M Bytes on my machine. It is a big file.
On my website, the largest width an image can have is 748 pixels (this is the maximum width of the central column). So there is no point in the original image being 1511 pixels wide is there?
Well, yes there is, as a rough rule of thumb, the native width of an image on a website should be twice its actual maximum visible width.
You might think this odd, but it is to make the image look better on very high resolution monitors.
Where 4K and 5K monitors are used, they do not usually run at their native resolution (objects on the screen would be just too small), Windows usually scales the screen to give an apparent resolution that is smaller (say 2560 × 1440), this means that for a 5K monitor (native resolution of 5120 × 2880) every apparent pixel (driven by Windows) is actually 4 pixels on the monitor (2 across by 2 high).
It means that the monitor can resolve smaller difference in the image; hence it is better to have higher resolution images than you need.
Generally for very big images, reduce the size of the image (in proportion) until its width is about 1500 pixels (about twice the maximum width of 748 px).
If the native image is smaller than this, do not make it bigger, that will pixelate the image and make it look worse, instead fix the maximum width of the image, see § 15.6.
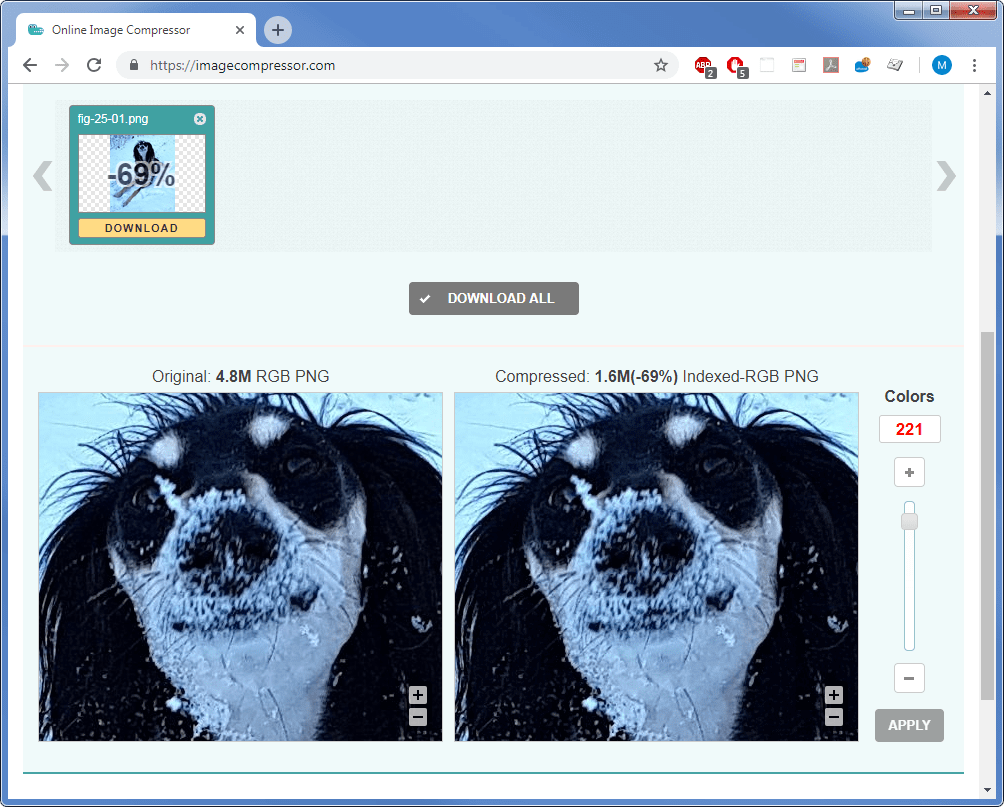
The next thing we can change is the number of different colours in the image. This can be done by using an image optimisation site, there are loads of these, the one I use is Optimazilla.
This is an easy to use site, just go to the page and drag the image you want compressing into the central area (where it says drop you files here). You can drag up to 20 files at once.
When I uploaded the Henry image, it gave me this:
Figure 25.5 Image compressor
That really is one stupid looking dog. I’m pretty sure he’s smiling.
The image on the left is the original image, the one on the right has been compressed, the number of colours has been reduced to 221 unique colours (the original image had 87,000). Buggered if I can see the difference.
The number picked by the website (221 in this case) is just a guess, feel free to reduce it further, play around with it, when you are happy click the download all button to get the minimised version.
I eventually reduced the colours to 20 on this image; it brought the image down to 716 KB (an 89% reduction). I’ve shown the original here with the compressed version below:
Figure 25.6 Compressed image, original at top, compressed below
I’m not sure I can tell the difference, if I zoom right in, you can see where the image quality is reduced:
Figure 25.7 Henry originalFigure 25.8 Henry 89% compressed
In close up, you can see that the right image is becoming slightly blocky and pixelated. You have to judge it yourself.
Under most circumstances your image file size can be compressed to in excess of 75% with little noticeable reduction in quality.
I always compress my images.
The Optimazilla site will compress most images: png, bmp, jpeg &c.
It won’t compress svg files though. For that you need kraken.io.
This does exactly the same for svg files, just drag and drop into the drag and drop area and click the download file underneath.
Svg files tend to be smaller by their nature; even so, you will get about a 60% reduction in file size.
25.2.5
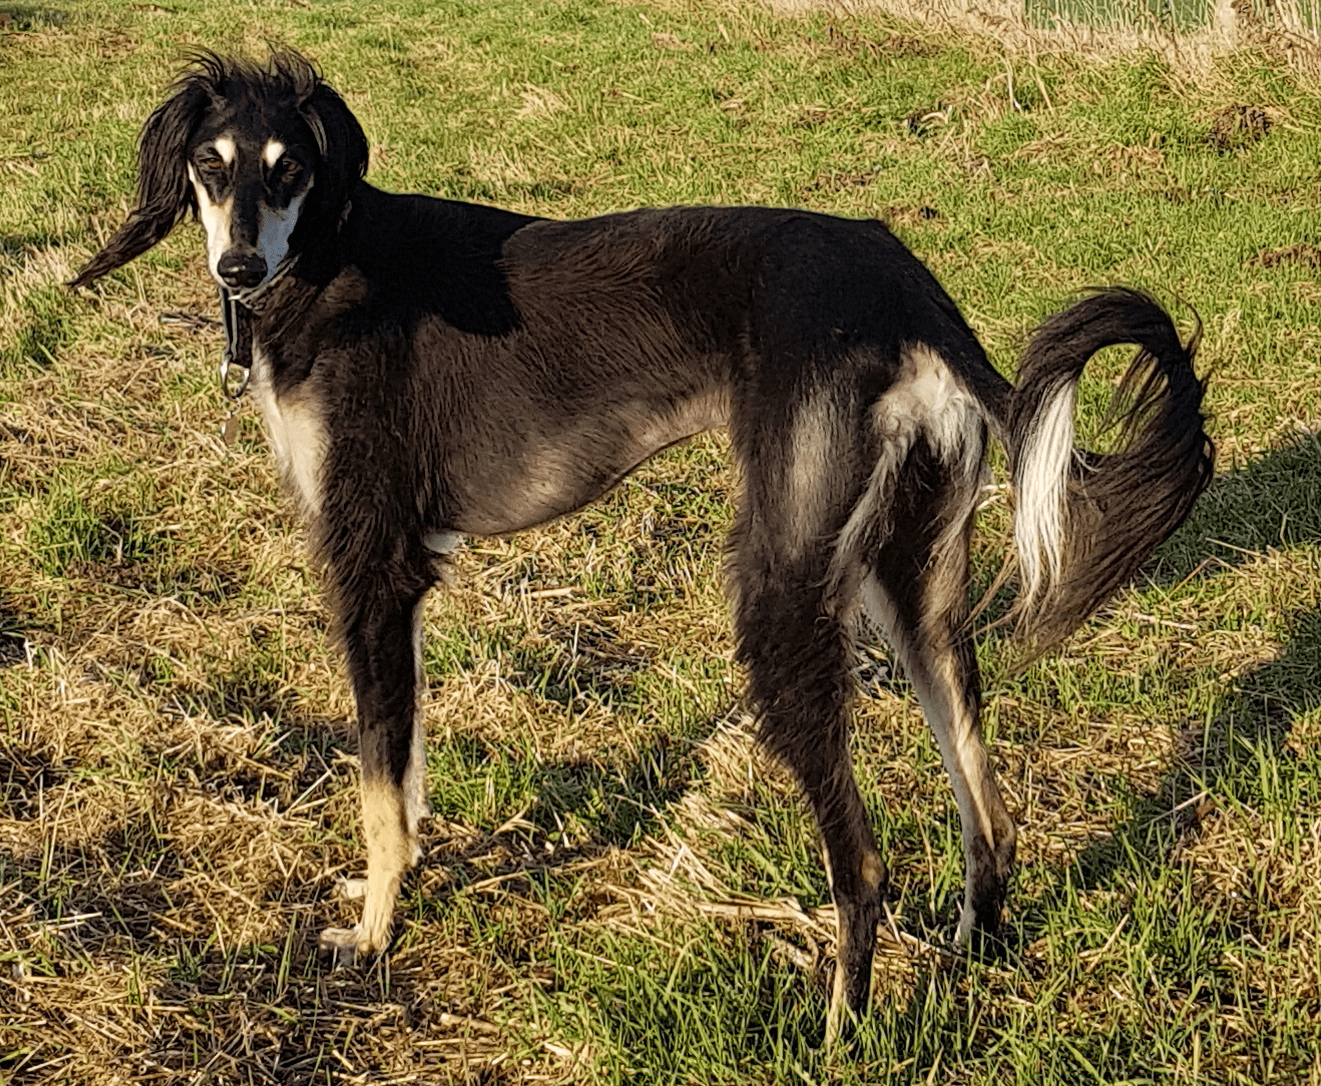
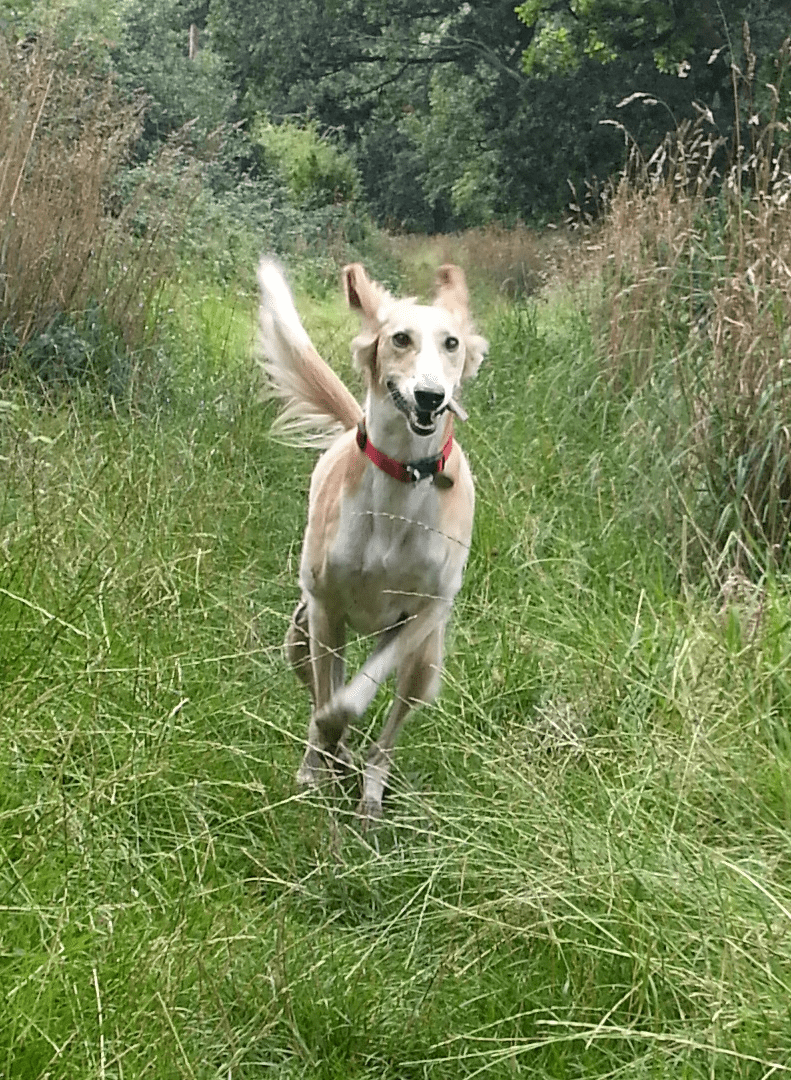
Final pictures of the dogs
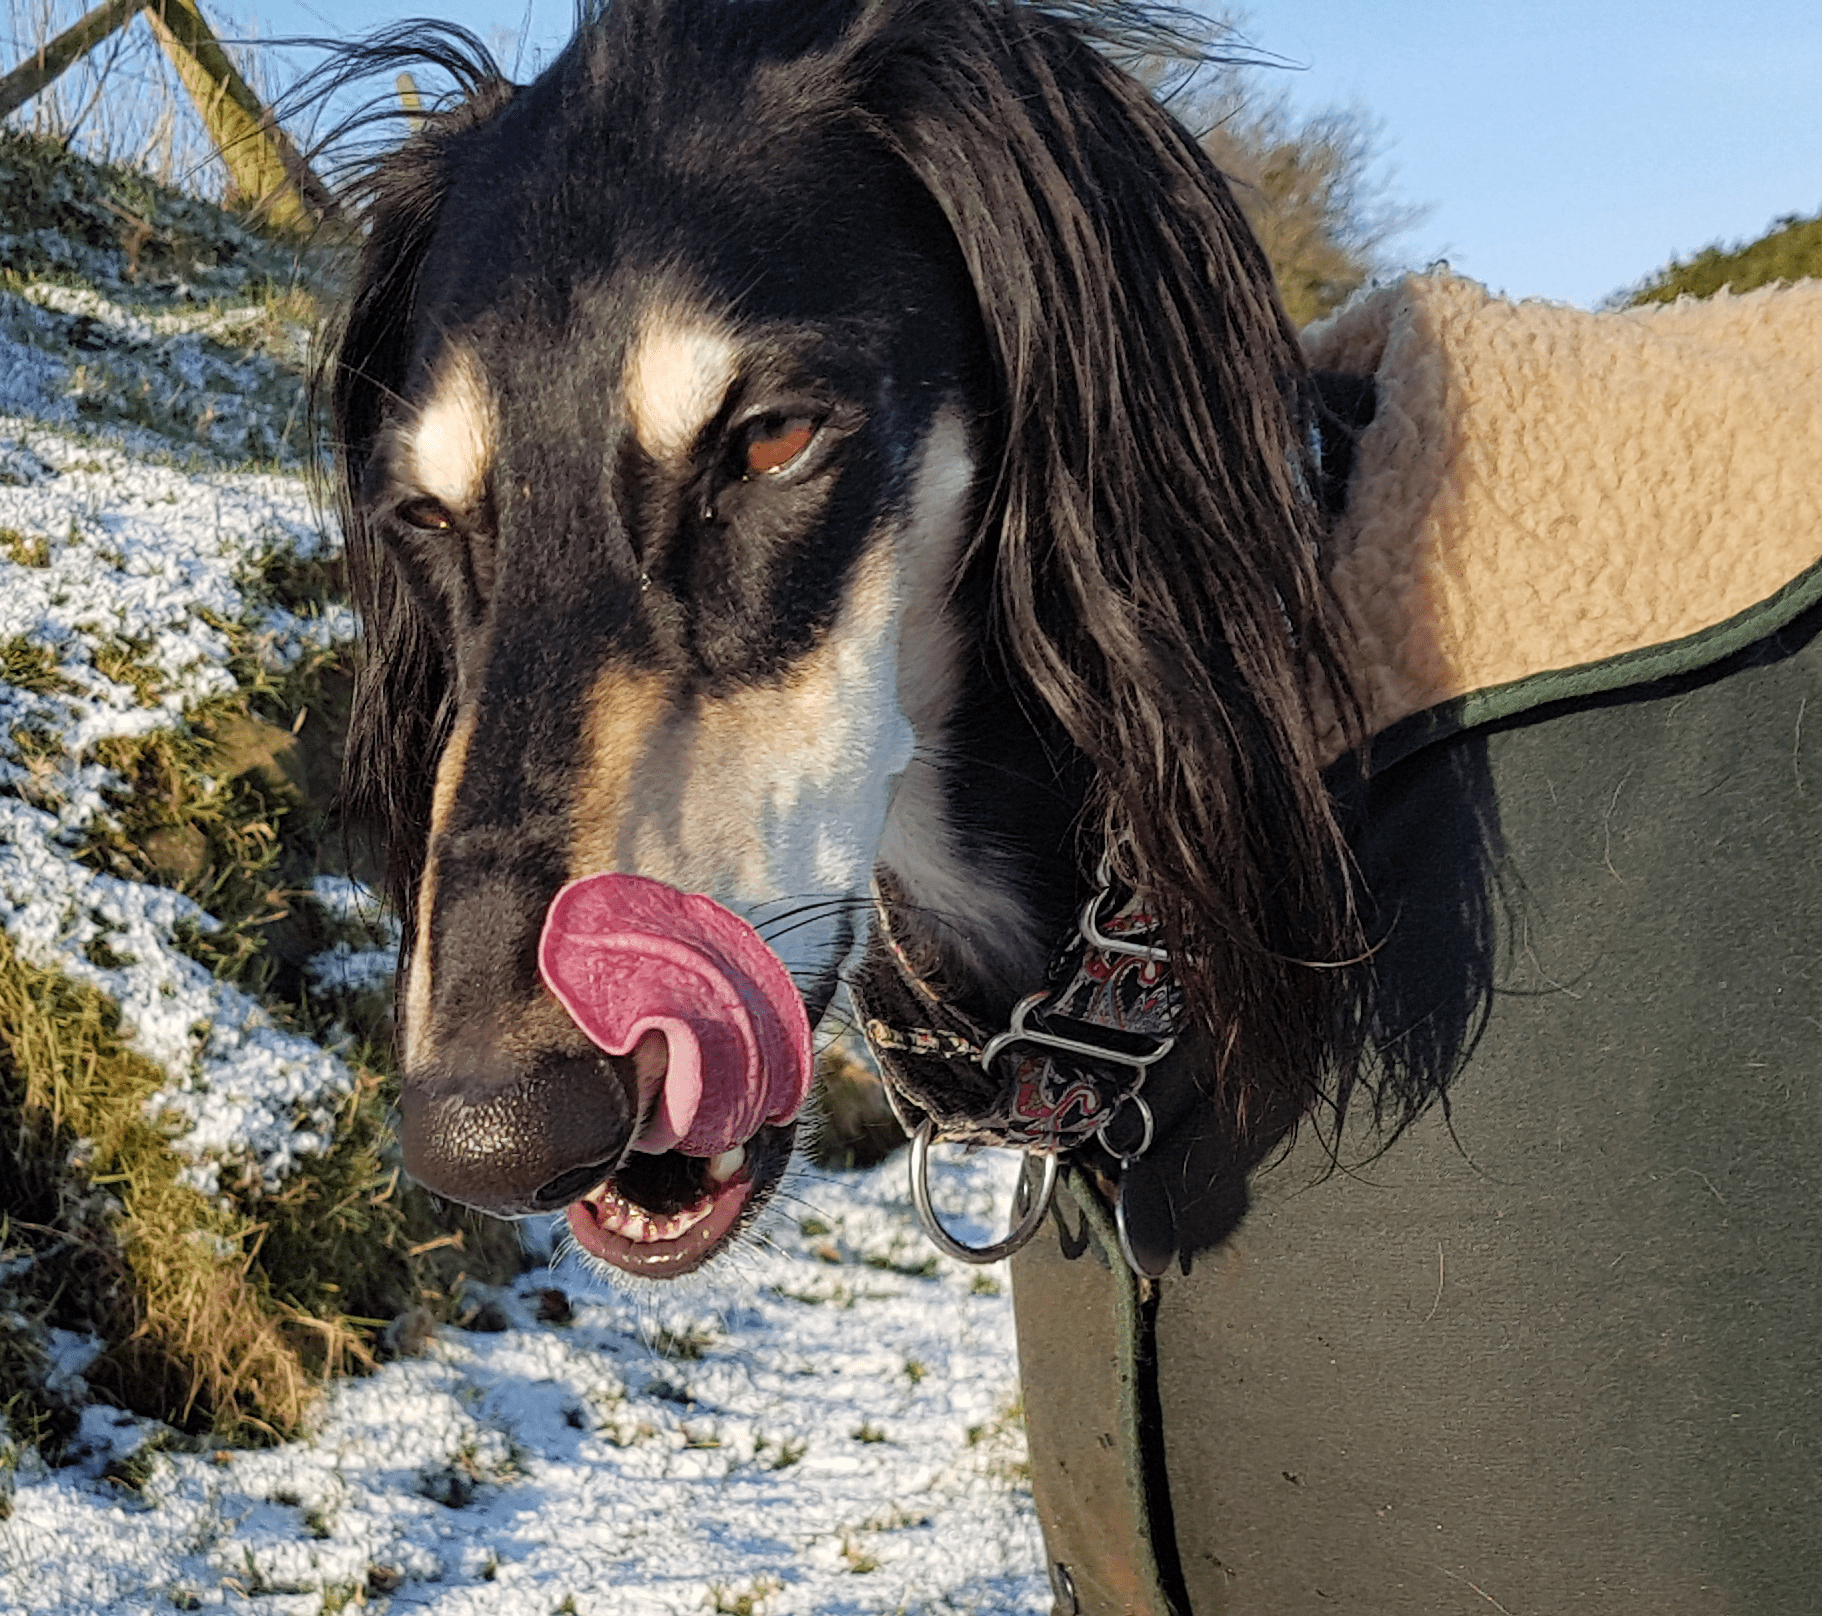
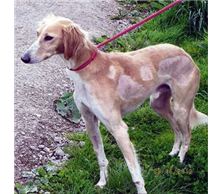
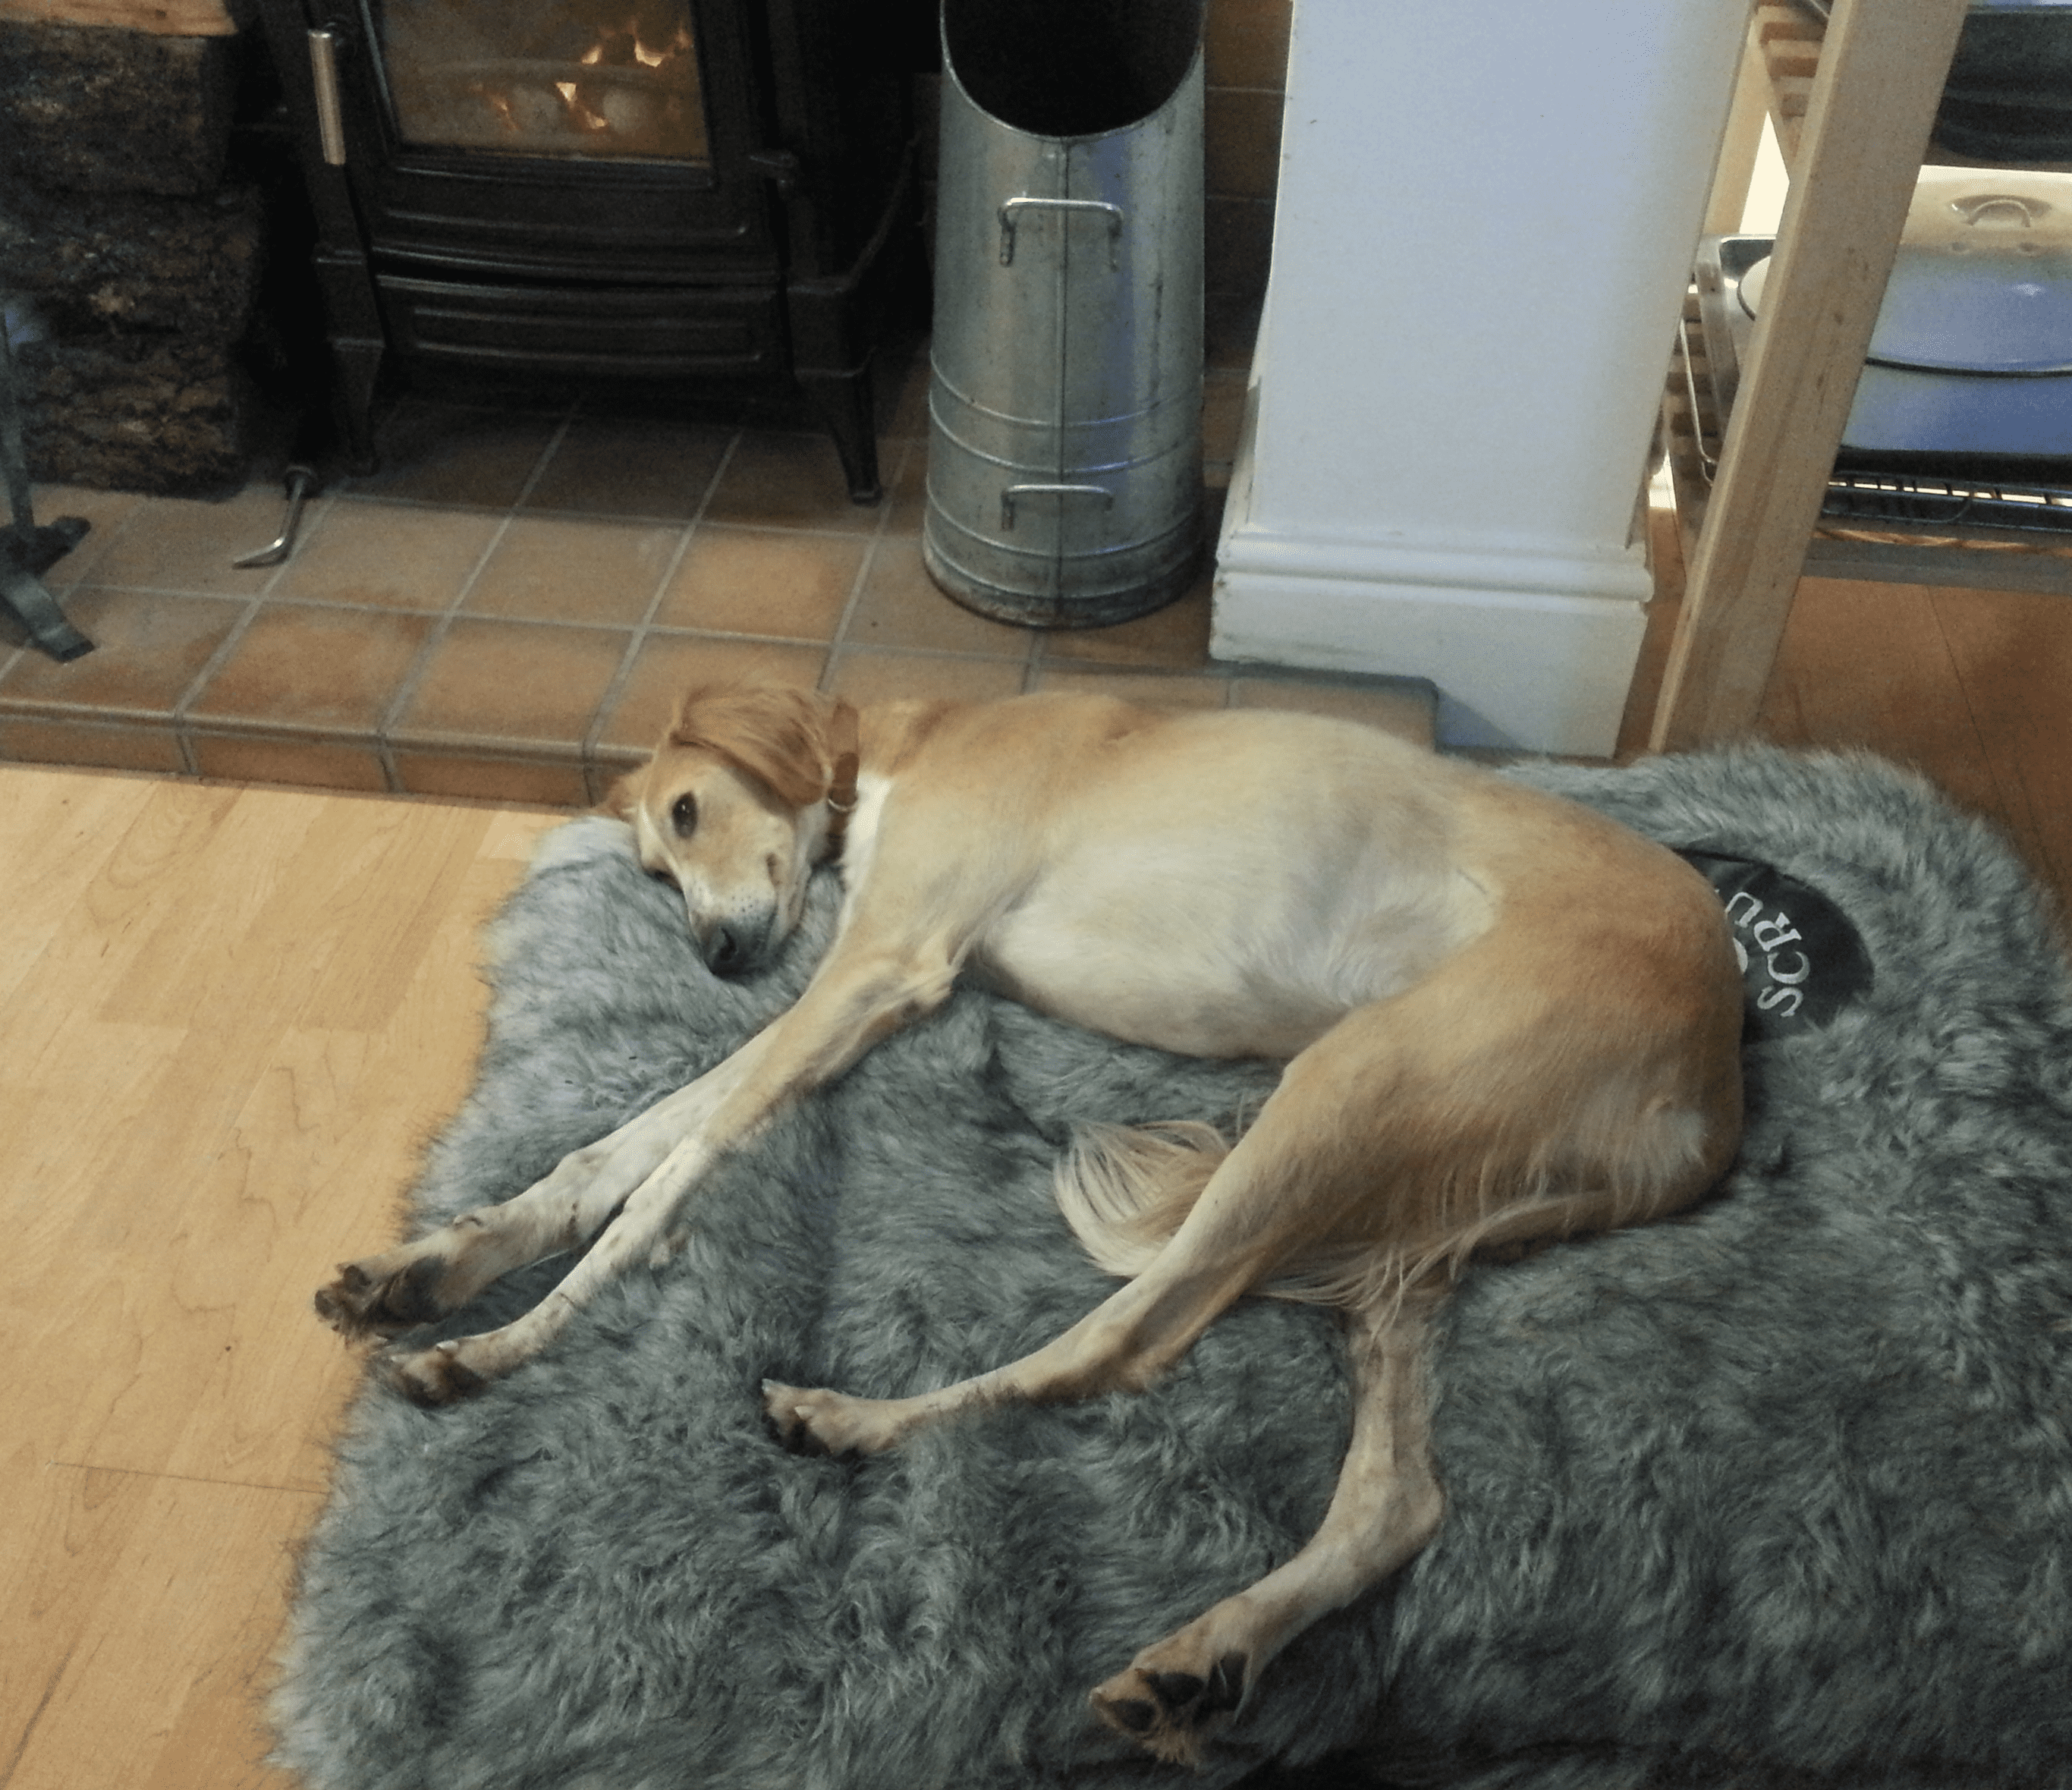
As promised, sensible pictures of the dogs, Hector is the blond, Henry the brunette.
Hmmm... Salukis also come equipped with tongues:
It’s actually quite hard to take a sensible picture of them; these are not like normal dogs.
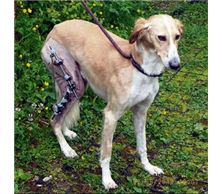
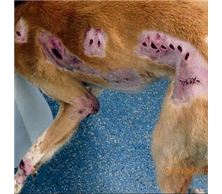
If you’re wondering about the scars on Hector’s nose and leg, he was abandoned as a pup and was living as a stray, he was eventually run over “dragged down Buckley High Street under the back wheels of a truck” said the paper, he managed to limp away and was found three days later under a hedge, he was almost dead.
The vet did some remarkable work on him and saved the leg (and shaved him almost bald in the process):
I met Hector during his recovery (he was called Hero then), he’s been with us ever since. He soon made himself at home, this was his first day (left) and yesterday (right):